Spice Rack Ideas: DIY Plans, Wall-Mounted & Cabinet Organizers
Why a Dedicated Spice Rack Transforms Your Kitchen
If you've ever spent five minutes rummaging through a cluttered cabinet looking for cumin, you already know the frustration of disorganized spices. A well-designed spice rack does more than just look nice on your wall — it saves time during meal prep, keeps spices visible so nothing expires forgotten in the back of a cabinet, and can even free up valuable counter and cabinet space in smaller kitchens.
Whether you're a weekend cook with a dozen go-to seasonings or an enthusiastic home chef with 80+ jars from around the world, there's a spice rack style that fits your kitchen layout, your cooking habits, and your budget. In this comprehensive guide, we'll walk through every major type of spice rack, help you choose the best wood for durability and aesthetics, provide standard dimensions and jar sizing info, share three complete DIY plans, and offer expert organization strategies that actually work in real kitchens.
Types of Spice Racks: Choosing the Right Style
The best spice rack for your kitchen depends on your available space, how many spices you use regularly, and whether you prefer your collection on display or tucked out of sight. Here's a detailed look at each major category.
Wall-Mounted Spice Racks
Wall-mounted racks are the classic choice and remain one of the most popular options for good reason. They keep spices at eye level, make every jar instantly visible, and free up both counter and cabinet space. You can mount them on any open wall, on the side of a cabinet, or even on the inside of a pantry door.
Wall-mounted racks come in several sub-styles: simple single-tier ledge shelves, multi-tier ladder designs, and grid or peg systems that let you rearrange jars freely. Most wall-mounted racks hold between 12 and 36 jars depending on the number of tiers and overall width. They work best in kitchens with at least some open wall space near the cooking area — ideally within arm's reach of the stove but away from direct heat and steam, which can degrade spice quality over time.
For a polished look that doubles as kitchen decor, consider a set of matching floating shelves sized specifically for spice jars. Floating shelves give a clean, modern aesthetic and can be stained or painted to match your cabinetry.
Cabinet Door Spice Racks
If you prefer a clutter-free kitchen with everything hidden behind closed doors, a cabinet door rack is an excellent solution. These racks mount on the inside of an upper cabinet door, turning otherwise wasted space into organized spice storage. When you open the cabinet, every jar is right there facing you — and when you close it, the kitchen looks perfectly clean.
Cabinet door racks typically hold 15 to 25 standard-size jars across three to five tiers. The key consideration is clearance: you need enough depth inside the cabinet for both the rack and whatever else is stored on the shelves. Most cabinet door racks extend 2.5 to 3.5 inches from the door surface, so measure your interior shelf depth carefully before installing. If your cabinets have adjustable shelves, you may need to shift them back slightly to prevent the door from bumping into contents when closing.
When building or selecting a cabinet door rack, pay attention to the cabinet hardware — heavier racks loaded with full glass jars can strain standard hinges over time. Consider upgrading to heavy-duty hinges if your loaded rack will exceed five pounds.
Pull-Out Drawer Insert Spice Racks
Pull-out drawer inserts represent the premium tier of spice organization. These are tiered or angled trays that slide out from a narrow cabinet slot (typically 4 to 6 inches wide) on full-extension drawer slides, giving you complete access to every jar from above. They're the same concept used in professional kitchen design and high-end cabinetry.
The biggest advantage of pull-out racks is capacity paired with accessibility — a tall pull-out unit can hold 40 to 60 jars while occupying only a sliver of cabinet width. They're especially effective next to the stove or in a kitchen island where you want spices close at hand without any visible clutter. The main drawback is complexity: pull-out racks require quality drawer slides (soft-close, full-extension ball-bearing slides are the gold standard), precise cabinet dimensions, and more advanced woodworking skills if you're building one yourself.
Countertop Spice Racks
Countertop racks are the simplest option — no installation, no tools, no commitment. Just place them on your counter and load them up. They come in everything from simple two-tier stepped shelves to rotating carousels and elegant A-frame designs. Countertop racks are ideal for renters who can't modify cabinets or walls, for cooks who want their most-used spices immediately accessible, and for anyone who appreciates the decorative element of displayed spice jars.
The trade-off is counter space. A typical countertop rack occupies a 10×10-inch to 16×10-inch footprint, which is significant in a small kitchen. If counter space is at a premium, consider a compact rotating carousel that holds 16 to 20 jars in about an 8-inch diameter circle.
Magnetic Spice Racks
Magnetic racks are a modern, space-efficient solution that attaches spice tins to a magnetic strip or board mounted on the wall, refrigerator side, or backsplash. They create a striking visual display and use virtually zero shelf or counter space. Most magnetic systems use small metal tins with clear lids rather than traditional glass jars, which keeps spices visible while maintaining a uniform, clean look.
Magnetic racks work best for frequently used spices (10 to 20 varieties) rather than an entire collection. The tins are typically smaller than standard jars (2 to 4 oz), so you'll refill them more often from bulk storage. They're also not ideal for humid environments near the stove, since the metal tins can develop condensation issues.
Lazy Susan Spice Racks
A lazy susan (turntable) rack is perfect for deep cabinets or corner cabinet dead zones where standard shelves leave jars lost in the back. The rotating platform brings every jar to the front with a simple spin, eliminating the need to reach into dark cabinet depths. Multi-tiered lazy susan designs can hold 30 to 40 jars in a 12-inch diameter footprint.
Lazy susans are available in single-tier and stacked two- or three-tier designs. For corner cabinets, look for D-shaped or kidney-shaped lazy susans that maximize the oddly shaped interior space. The key to a good lazy susan rack is smooth bearing quality — cheap plastic bearings wobble and stick, while steel ball-bearing turntables spin smoothly for years.
Tiered Shelf Spice Racks
Tiered shelf racks (also called staircase or stadium-style racks) sit inside a standard cabinet or pantry and create ascending steps so jars in the back are elevated above those in front. This simple design solves the biggest problem with storing spices on flat shelves — the inability to see or reach jars behind the front row.
Tiered racks are typically 8 to 15 inches wide and 8 to 12 inches deep with three or four levels. They're expandable (you can place multiple units side by side), affordable, and require no installation whatsoever. They work best in cabinets with at least 8 inches of vertical clearance between shelves.
Spice Rack Type Comparison
| Type | Capacity | Space Used | Install Difficulty | Best For | Price Range |
|---|---|---|---|---|---|
| Wall-Mounted | 12–36 jars | Wall space | Easy | Open kitchens, visual display | $15–$80 |
| Cabinet Door | 15–25 jars | Inside cabinet door | Easy | Hidden storage, clean look | $10–$40 |
| Pull-Out Drawer | 40–60 jars | Narrow cabinet slot | Advanced | Large collections, pro kitchens | $60–$250 |
| Countertop | 12–30 jars | Counter surface | None | Renters, quick access | $15–$60 |
| Magnetic | 10–20 tins | Wall/fridge surface | Easy | Small spaces, modern decor | $20–$50 |
| Lazy Susan | 20–40 jars | Cabinet interior | None | Deep/corner cabinets | $15–$45 |
| Tiered Shelf | 15–28 jars | Cabinet shelf | None | Pantries, standard cabinets | $10–$30 |
Best Wood Species for Spice Racks
The wood you choose for a spice rack affects its look, durability, and how well it holds up in a kitchen environment with heat, moisture, and occasional spills. Here are the top choices.
Bamboo
Bamboo is the most popular material for commercially produced spice racks, and for good reason. It's extremely hard (harder than most hardwoods by Janka rating), naturally moisture-resistant, lightweight, and sustainably harvested. Bamboo's light golden tone works in virtually any kitchen color scheme, and it cleans up easily with a damp cloth. It's also the most affordable hardwood-grade option for pre-made racks.
Maple
Maple is a classic choice for kitchen woodwork. Its tight, closed grain resists moisture absorption and doesn't harbor bacteria — the same reason maple is the standard for cutting boards and butcher blocks. Hard maple's pale, creamy color brightens cabinet interiors and complements both traditional and contemporary kitchen designs. It takes stain beautifully if you want a darker finish, though many people prefer maple's natural light tone with just a clear food-safe oil finish.
Walnut
For a rich, warm, luxurious look, walnut is hard to beat. Its deep chocolate-brown color with flowing grain patterns makes a walnut spice rack a genuine piece of kitchen art. Walnut is moderately hard, easy to work with hand and power tools, and ages beautifully — developing a deeper, more golden patina over years. It's the premium choice for a display-quality wall-mounted rack or a statement countertop piece. The main consideration is cost: walnut typically runs 2 to 3 times the price of maple or pine.
Pine
Pine is the budget-friendly workhorse of DIY spice rack projects. It's widely available at every lumber yard and home center, easy to cut and sand, accepts stain and paint well, and costs a fraction of hardwood alternatives. Knotty pine adds rustic character that works beautifully in farmhouse and cottage-style kitchens. The trade-off is softness — pine dents and scratches more easily than hardwoods, and its open grain can absorb moisture and stains if not properly sealed. A good polyurethane or food-safe finish is essential for pine spice racks.
Wood Selection Comparison
| Wood | Hardness (Janka) | Moisture Resistance | Workability | Cost | Best Style |
|---|---|---|---|---|---|
| Bamboo | 1,380+ lbf | Excellent | Good (pre-made panels) | $ | Modern, minimal |
| Maple | 1,450 lbf | Very Good | Good | $$ | Traditional, clean |
| Walnut | 1,010 lbf | Good | Excellent | $$$ | Luxury, display |
| Pine | 380–690 lbf | Fair (needs finish) | Excellent | $ | Rustic, farmhouse |
Standard Spice Rack Dimensions
Getting the dimensions right is critical, especially if you're building a custom rack or fitting one into existing cabinetry. Here are the standard measurements you'll need.
Common Rack Sizes
- Single-tier wall shelf: 16–24 inches wide × 3.5 inches deep × 3.5 inches tall
- Three-tier wall rack: 16–20 inches wide × 3–3.5 inches deep × 18–22 inches tall
- Cabinet door rack: 11–14 inches wide × 2.5–3 inches deep × 16–20 inches tall
- Pull-out insert: 4–6 inches wide × 18–22 inches deep × 24–30 inches tall
- Countertop tiered: 12–16 inches wide × 8–10 inches deep × 6–8 inches tall
- Lazy susan: 10–12 inch diameter × 4–10 inches tall
Spice Jar Sizing Reference
Matching your rack dimensions to your jar sizes prevents the frustration of jars that don't fit or wasted space between jars.
| Jar Size | Typical Dimensions | Shelf Depth Needed | Shelf Height Clearance |
|---|---|---|---|
| Small (2 oz) | 1.5" dia × 3" tall | 2" | 3.5" |
| Standard (4 oz) | 2" dia × 4" tall | 2.5" | 4.5" |
| Large (8 oz) | 2.5" dia × 5" tall | 3" | 5.5" |
| Bulk (16 oz) | 3" dia × 6" tall | 3.5" | 6.5" |
When designing a custom rack, add at least 0.5 inches of clearance above the tallest jar for easy removal and 0.25 inches between jars horizontally for finger access.
DIY Spice Rack Plans
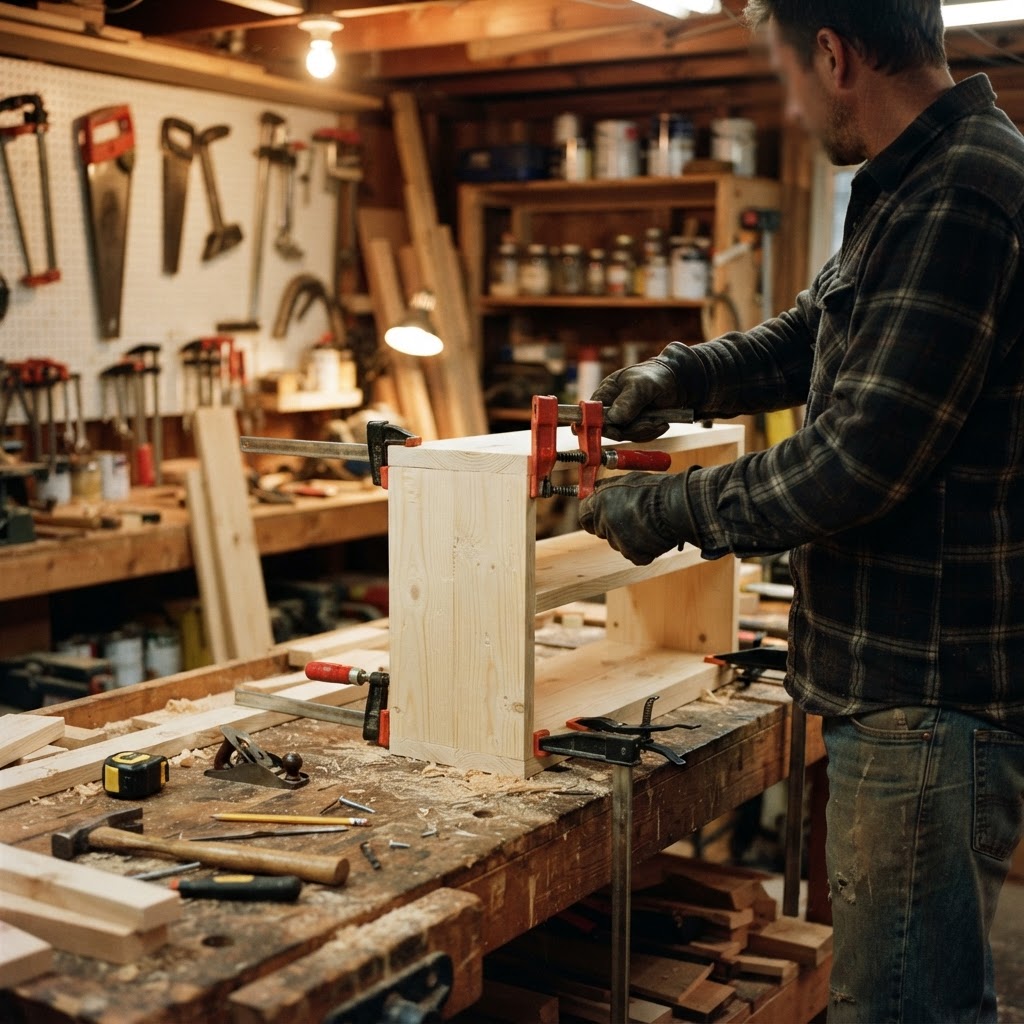
Building your own spice rack lets you customize dimensions for your exact jars, match your kitchen's wood tones, and often saves money compared to premium store-bought options. Here are three complete project plans at different skill levels.
Plan 1: Floating Shelf Spice Rack (Beginner)
This simple project creates a set of two or three floating shelves sized perfectly for standard 4 oz spice jars with a slim front lip to keep jars from sliding off.
Materials needed:
- 3/4" maple or pine board, 3.5" wide × 24" long (one per shelf)
- 1/4" × 3/4" strip for front lip (one per shelf)
- Floating shelf mounting hardware (keyhole brackets or French cleats)
- Wood glue, sandpaper (120 and 220 grit), food-safe finish
Steps:
- Cut your shelf boards to length — 16 to 24 inches works well for 6 to 10 jars per shelf.
- Cut the front lip strips to matching length.
- Sand all pieces to 220 grit, easing all sharp edges.
- Glue and clamp the lip strip flush with the front bottom edge of each shelf, creating a 3/4-inch raised lip.
- Once dry, attach keyhole brackets or a French cleat to the back of each shelf.
- Apply two coats of food-safe oil or water-based polyurethane.
- Mount shelves on the wall 6 to 8 inches apart vertically, ensuring level.
Estimated cost: $15–$30 for three shelves (pine) or $25–$50 (maple)
Time: 2–3 hours plus drying time
Plan 2: Cabinet Door Mounted Rack (Intermediate)
This rack mounts on the inside of an upper cabinet door with four tiers of narrow shelves held by thin side rails. It keeps 20 jars organized and completely hidden when the door is closed.
Materials needed:
- 1/2" × 2.5" maple or birch for shelf tiers (4 pieces at 12" long)
- 1/2" × 1" maple or birch for side rails (2 pieces at 18" long)
- 1/4" × 1" strip for front lips (4 pieces at 12" long)
- Wood screws (#6 × 1"), wood glue, sandpaper, finish
- 4 cabinet-mount screws appropriate for your door thickness
Steps:
- Cut all pieces to size. Sand everything to 220 grit.
- Mark the side rails for shelf positions, spacing tiers 4.5 inches apart (center to center).
- Attach shelves to side rails using glue and screws from the outside of the rails into shelf ends.
- Glue and pin-nail the front lip strips along the front edge of each shelf.
- Apply finish and let dry completely.
- Hold the assembled rack against the inside of the cabinet door, mark screw holes, and secure with cabinet-mount screws through the side rails into the door.
- Test the door closure to confirm the rack clears interior shelves. Adjust shelf positions if needed.
Estimated cost: $20–$40
Time: 3–4 hours plus drying time
Plan 3: Pull-Out Drawer Insert (Advanced)
This is the premium DIY option: a tall, narrow pull-out rack with angled shelves on both sides that slides out from a 5-inch-wide gap between cabinets or replaces a filler strip next to the refrigerator.
Materials needed:
- 1/2" Baltic birch plywood for the main frame and shelves
- 1/4" plywood for shelf dividers and back panel
- Full-extension, soft-close drawer slides (18" or 22" length, rated for 75+ lbs)
- Handle or pull
- Wood screws, brad nails, wood glue, sandpaper, clear polyurethane
Steps:
- Build the outer frame: two tall side panels connected by a top and bottom piece, creating a box that fits your cabinet opening (typically 5" W × 22" D × 28" H).
- Build the inner carriage: a slightly narrower box that will slide inside the frame on drawer slides.
- Cut angled shelf brackets and attach small shelf tiers on both sides of the inner carriage, angled at about 15 degrees so jars tilt back slightly for visibility and retention.
- Mount drawer slides to the frame and carriage following manufacturer instructions.
- Attach a front panel with a handle that sits flush with the cabinet face when closed.
- Sand, finish, and install the frame into the cabinet opening.
Estimated cost: $60–$120 (slides are the biggest expense)
Time: 6–10 hours
Spice Organization Strategies That Work
Having the right rack is only half the battle — how you organize your spices within it determines whether you actually find things quickly. Here are proven approaches used by professional organizers and experienced home cooks.
Alphabetical Organization
The simplest and most universally understood system. Arrange all spices A to Z, left to right, top to bottom. This works best for large collections (30+ spices) where grouping by any other category would create uneven sections. The advantage is that anyone in the household can find and return spices to the correct position. The disadvantage is that unrelated spices sit next to each other, so you might be reaching across the rack repeatedly while making a single recipe.
Organization by Cuisine
Group spices by the type of cooking they're most commonly used in: Italian (basil, oregano, rosemary, thyme, red pepper flakes), Mexican (cumin, chili powder, cayenne, coriander, paprika), Indian (turmeric, garam masala, cardamom, cumin, mustard seed), Asian (ginger, five-spice, star anise, sesame, white pepper), and baking (cinnamon, nutmeg, allspice, cloves, vanilla). This approach is ideal for cooks who tend to cook in a specific style each night, since you can grab a cluster of related spices all at once.
Organization by Frequency of Use
Place your most-used spices at eye level and within easiest reach. Reserve the bottom shelf or the back of the lazy susan for specialty spices you use once a month or less. This is the most ergonomic approach and reduces daily reaching and searching. Review and rotate your arrangement every few months as cooking habits change seasonally.
Hybrid Systems
Many experienced cooks use a combination: the 10 to 15 most-used spices go in a small countertop rack or magnetic strip by the stove, while the full collection lives in an alphabetized cabinet rack or pull-out. This "hot zone / cold storage" approach gives you speed for everyday cooking and organization for the full collection.
Custom vs. Pre-Made Spice Racks
Deciding between building a custom rack and buying a pre-made one depends on your budget, your woodworking skills, and how specific your storage needs are.
| Factor | Custom / DIY | Pre-Made / Store-Bought |
|---|---|---|
| Cost | $15–$120 (materials) | $15–$250 (retail) |
| Fit | Exact to your space | Standard sizes only |
| Wood choice | Any species you want | Usually bamboo or pine |
| Time investment | 2–10 hours | 5–30 minutes |
| Skill required | Basic to advanced | None |
| Customization | Unlimited | Limited |
| Durability | High (solid wood) | Varies widely |
| Satisfaction | High (you built it) | Immediate |
If you enjoy woodworking and have basic tools (saw, drill, sandpaper), a custom rack is absolutely worth the effort — especially for non-standard spaces like oddly sized cabinet openings, slanted walls, or unusually deep pantries. If you need a solution today and don't have the tools or inclination, a quality bamboo or maple pre-made rack will serve you well for years.
Spice Storage Tips for Freshness and Longevity
No matter which rack style you choose, proper spice storage dramatically extends flavor and potency.
- Keep spices away from heat: Don't mount racks directly above the stove or next to the oven. Heat accelerates flavor degradation. The ideal location is near (but not over) your cooking area.
- Minimize light exposure: UV light breaks down flavor compounds. If your rack is in direct sunlight, consider opaque jars or a cabinet-enclosed rack.
- Use airtight containers: Transfer spices from paper packets or plastic bags into glass jars with tight-fitting lids. Glass doesn't absorb odors and creates a better seal than most plastic.
- Label with dates: Mark the purchase or opening date on every jar. Ground spices lose potency after 6 to 12 months; whole spices last 2 to 3 years; dried herbs peak at 1 to 2 years.
- Buy whole when possible: Whole seeds, peppercorns, and bark sticks retain flavor far longer than pre-ground versions. Grind just before use with a dedicated spice grinder or mortar and pestle.
- Don't shake over steam: Never shake a spice jar directly over a steaming pot — the moisture entering the jar promotes clumping and mold growth. Instead, pour into your hand or a small bowl first.
Frequently Asked Questions About Spice Racks
What is the best width for a spice rack shelf?
For standard 4 oz round spice jars (about 2 inches in diameter), a shelf depth of 2.5 to 3 inches works perfectly. This provides enough room for the jar plus a small front lip to prevent rolling or sliding off. If you use square jars, you can go slightly shallower since they won't roll.
How far apart should spice rack shelves be spaced?
Space shelves 4 to 5 inches apart (center to center) for standard jars. This gives about 4.5 inches of vertical clearance between shelf surfaces — enough for a 4-inch-tall jar plus finger room to grab it. For large jars (8 oz or bigger), increase spacing to 6 inches.
Can I build a spice rack from pallet wood?
You can, but be selective. Only use pallets stamped "HT" (heat treated), never those stamped "MB" (methyl bromide treated). Sand pallet wood thoroughly, as it's often rough and can contain splinters. Pallet wood gives a beautiful rustic look but requires more preparation than dimensional lumber from the hardware store.
How many spices does the average home cook need?
Most home cooks actively use between 15 and 25 different spices and dried herbs. A well-stocked starter collection includes salt, black pepper, garlic powder, onion powder, paprika, cumin, chili powder, oregano, basil, thyme, cinnamon, ginger, red pepper flakes, and Italian seasoning. Plan your rack size for 30 to 40 jars to allow room for your collection to grow.
What finish should I use on a kitchen spice rack?
Use a food-safe finish since the rack will be near food preparation areas. Good options include food-grade mineral oil, walnut oil, or a water-based polyurethane rated as food-safe when cured. Avoid oil-based polyurethanes near food areas due to off-gassing during curing. Reapply oil finishes every 6 to 12 months to maintain moisture protection.
Frequently Asked Questions
Lumberama Team
Building Materials Experts
Contributor to Lumberama’s reference library. Read our editorial standards and source methodology.
Explore related resources
Where readers of this article usually go next.
Related Articles

Chicken Coop Guide: How to Build, Cost & Plans
Start your backyard flock with this comprehensive coop building guide.

Pressure Washing Guide: Cost, Tips & When to Wash
Restore your home's exterior with this power washing guide.

Cabinet Guide: Types, Cost & How to Choose Kitchen Cabinets
Find the right cabinets for your kitchen remodel.