Kitchen Island Ideas: DIY Plans, Materials & Design Guide
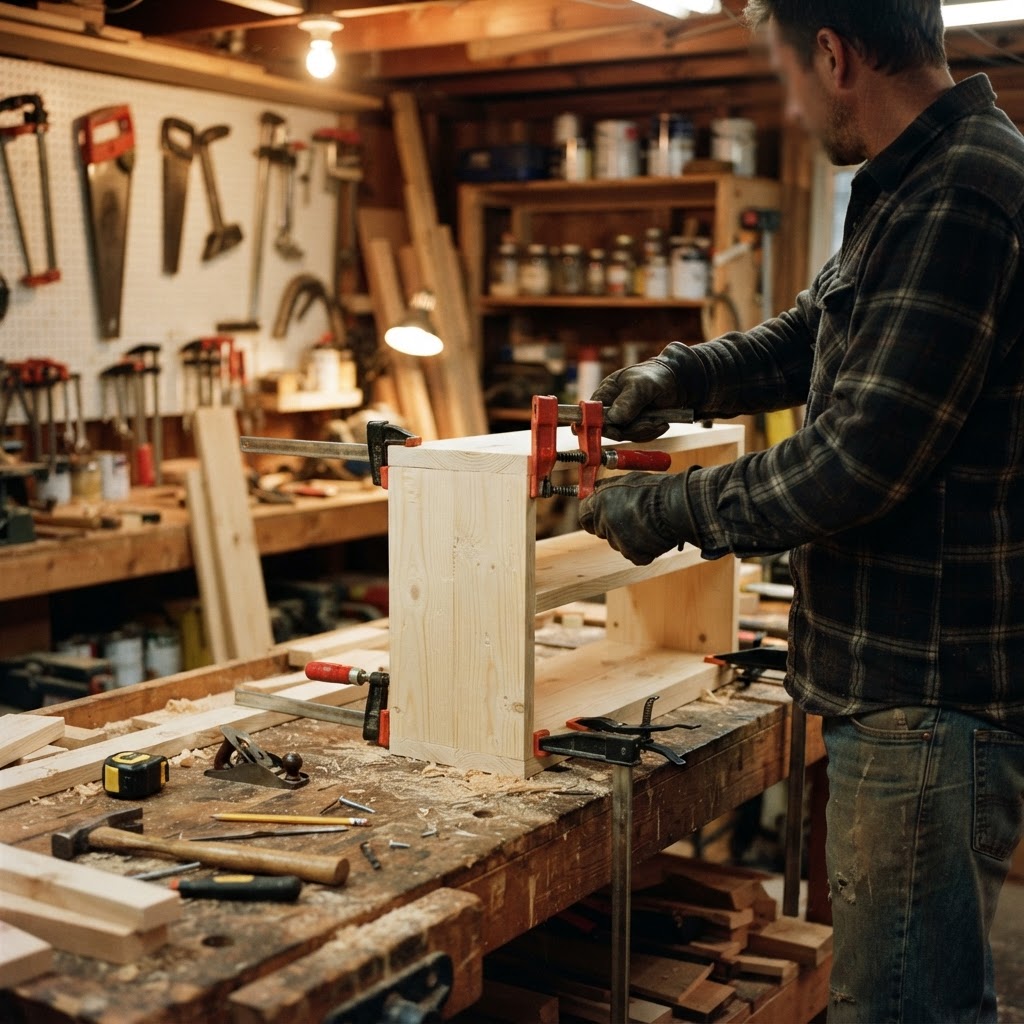
Why a Kitchen Island Changes Everything
A kitchen island is the single most-requested feature in modern kitchen design, and for good reason. It adds counter space for meal prep, creates a natural gathering spot for family and guests, provides critical storage below, and can house a sink, cooktop, or dishwasher. Whether you are planning a full kitchen remodel or looking for a weekend project that transforms your space, this guide walks you through every decision—from island type and countertop material to exact dimensions and three complete DIY build plans.
We will cover the four main island types, compare the most popular countertop surfaces, break down standard sizing rules so your island fits your kitchen perfectly, and give you realistic cost ranges from budget-friendly rolling carts to high-end custom installations. Let's build the island your kitchen deserves.
Types of Kitchen Islands
Stationary (Fixed) Islands
The classic kitchen island is permanently fixed to the floor, often anchored through the subfloor into joists. Stationary islands can support heavy stone countertops, house plumbing for a prep sink, and include electrical outlets for appliances. They are the best choice when you have at least 10 feet of open kitchen width (leaving 36–42 inches of clearance on each side) and want maximum functionality.
Rolling Cart Islands
A rolling cart island sits on locking casters, giving you the flexibility to reposition it or roll it out of the way entirely. Cart islands are ideal for smaller kitchens, apartments, and renters who cannot make permanent modifications. Most carts are 30–36 inches wide, include a shelf or drawer below, and feature a butcher-block or stainless-steel top. Budget range: $150–$600.
Peninsula Islands
A peninsula is attached to an existing run of cabinets or a wall on one end, forming an L-shape or U-shape in the kitchen. Peninsulas do not require as much open floor space as a freestanding island and are easier to plumb and wire because they connect directly to existing wall infrastructure. They still provide ample prep space and can include a raised bar for seating on the outer side.
Waterfall-Edge Islands
The waterfall island features a countertop material—usually quartz, marble, or concrete—that cascades down one or both sides of the base to the floor. This creates a sleek, modern look that hides the cabinetry underneath. Waterfall edges require precise miter cuts and strong adhesive or mechanical fasteners at the joint. They work best with engineered stone because natural stone is heavier and harder to join seamlessly. Expect to add $800–$2,000 to your countertop budget for the waterfall detail.
Countertop Materials Compared
| Material | Cost per Sq Ft | Durability | Maintenance | Best For |
|---|---|---|---|---|
| Butcher Block | $40–$100 | Medium — dents and scratches over time | Oil every 4–6 weeks | Warm, rustic look; active cooking islands |
| Granite | $50–$200 | High — heat and scratch resistant | Seal once per year | Traditional kitchens; heavy-use islands |
| Quartz | $55–$150 | Very High — non-porous, stain resistant | Wipe clean; no sealing | Modern kitchens; low-maintenance owners |
| Marble | $75–$250 | Medium — etches with acid | Seal 2x per year; blot spills quickly | Baking stations; high-end aesthetics |
| Concrete | $65–$135 | High — extremely strong | Seal and wax periodically | Industrial and modern designs; custom shapes |
Butcher Block Deep Dive
Butcher block remains one of the most popular island countertop choices because of its warmth, affordability, and DIY-friendliness. The best species for butcher block are hard maple (the industry standard for cutting boards), walnut (rich color, softer but beautiful), and white oak (tight grain, excellent durability). Edge-grain construction offers a good balance of looks and durability, while end-grain is the premium choice for serious cooks because it is gentler on knife edges. Read our complete butcher block countertops guide for species comparisons, finishing options, and maintenance schedules.
Base Cabinet Materials
Solid Wood
Solid hardwood bases—typically oak, maple, or birch—offer the strongest construction and can be stained or painted to match your kitchen cabinetry. Solid wood is the best choice when you want visible face frames or open shelving below the countertop. Expect to pay $200–$500 per linear foot for custom solid-wood base cabinets.
Painted MDF
Medium-density fiberboard provides a smooth, grain-free surface that paints beautifully. MDF panels are more affordable than solid wood ($80–$200 per linear foot) and resist warping in temperature-controlled kitchens. However, MDF swells if exposed to standing water, so it is not the best choice for islands with sinks unless you seal all edges and joints carefully.
Reclaimed Wood
Reclaimed barn wood, pallet wood, or salvaged lumber gives your island a one-of-a-kind rustic character. Reclaimed wood requires more prep—denailing, planing, sanding, and sealing—but the result is a conversation piece that no factory can replicate. Cost varies wildly from free (if you source it yourself) to $15–$30 per board foot for curated reclaimed hardwood.
Kitchen Island Dimensions and Sizing Guide
Standard Heights
Overhang for Seating
Clearance Rules
- 36 inches minimum clearance on all walkway sides
- 42–48 inches on the cooking side (near the range or oven) for safety
- 44 inches minimum if two cooks regularly pass each other
Common Island Sizes by Seating Capacity
| Seats | Island Length | Island Depth | Overhang Side |
|---|---|---|---|
| 2 | 48" | 24–30" | One short end or one long side |
| 3–4 | 60–72" | 30–36" | One long side |
| 5–6 | 84–96" | 36–42" | One long side + one short end |
Storage Features Worth Adding
- Deep drawers for pots, pans, and mixing bowls — more accessible than lower cabinets with doors
- Pull-out trash and recycling bins — keeps waste hidden and accessible from the prep side
- Open shelving on the dining side for cookbooks, decorative items, or frequently used dishes
- Spice racks and knife blocks built into the end panel near the cooktop
- Wine rack or beverage cooler integrated into the base on the entertaining side
- Appliance garage — a cabinet with a tambour or lift door that hides mixers and toasters
Quality drawer slides are essential for heavy-duty island drawers. Choose full-extension, soft-close slides rated for at least 100 pounds to handle cast-iron cookware. For cabinet doors, select hardware that complements your kitchen style—bar pulls for modern, bin pulls for farmhouse, and knobs for traditional.
Electrical and Plumbing Considerations
Electrical
The National Electrical Code (NEC) requires at least one duplex outlet on any island countertop wider than 12 inches and longer than 24 inches. All island outlets must be GFCI-protected. If you plan to install a cooktop or dishwasher, you will need dedicated circuits (typically 20-amp for a dishwasher, 40- or 50-amp for an electric cooktop). Budget $300–$800 for basic outlet installation and $500–$1,500 for dedicated appliance circuits.
Plumbing
Adding a prep sink or full-size sink to your island requires running hot and cold supply lines and a drain line through the floor. Islands located far from existing plumbing stacks may need an island vent loop (also called a "Chicago loop" or "island vent") to meet code. Plumbing rough-in for an island sink typically costs $500–$1,500 in labor, plus the cost of the sink and faucet.
Three DIY Kitchen Island Build Plans
Plan 1: Simple Base Cabinet Island
- This is the fastest and most beginner-friendly build. Purchase two 30-inch stock base cabinets from any home center ($120–$200 each). Place them back-to-back so the doors face outward on both sides. Screw them together through the back panels using 1¼-inch cabinet screws. Cut a ¾-inch plywood panel to cover the exposed ends, attach it with brad nails and wood glue, then fill and paint or stain. Top with a pre-cut butcher-block countertop (6 feet of maple butcher block runs about $200–$350) attached with L-brackets from underneath. Add a decorative base molding around the bottom to give it a built-in look. Total project cost: $400–$
- 7
- 5
- Time: one weekend.
Plan 2: Repurposed Dresser or Buffet Island
- Find a sturdy old dresser or buffet at a thrift store, estate sale, or Facebook Marketplace ($50–$200). Remove the top, sand the entire piece to 150 grit, and apply two coats of cabinet-grade paint (we recommend a satin or semi-gloss alkyd enamel for durability). Replace the original hardware with new cabinet pulls. Cut a countertop to size—butcher block, reclaimed wood, or a slab of marble remnant from a stone yard—and attach it with construction adhesive and L-brackets. If the piece is not 36 inches tall, add a 4-inch plywood riser base and wrap it in baseboard molding. Total project cost: $200–$
- 5
- 0
- Time: one weekend plus drying time.
Plan 3: IKEA Hack Island (KALLAX or SEKTION)
- The IKEA KALLAX shelf unit (2x4 configuration, roughly $70) placed on its side creates an open-cube island base that is perfect for basket storage, wine cubbies, or displaying cookbooks. Build a simple 2x4 frame to raise it to 36 inches, wrap the top and sides with ¾-inch plywood or beadboard panels for a finished look, and add a butcher-block or quartz countertop on top. Alternatively, use two IKEA SEKTION base cabinet frames ($50–$80 each) with your choice of door fronts. The SEKTION route gives you a result that looks nearly identical to custom cabinetry at a fraction of the price. Total project cost: $300–$
- 6
- 0
- Time: one day.
Kitchen Island Cost Ranges
| Option | Cost Range | What You Get |
|---|---|---|
| Rolling Cart | $150–$600 | Portable, small footprint, basic storage |
| DIY Stock Cabinet Island | $400–$800 | Fixed island, good storage, butcher block top |
| Semi-Custom Island | $1,500–$5,000 | Custom sizing, stone countertop, matching cabinetry |
| Full Custom w/ Plumbing & Electric | $5,000–$15,000+ | Sink, cooktop, dishwasher, premium materials |
Design Tips and Common Mistakes
- Measure your clearances first. The number-one island regret is building too big for the space. Tape out the footprint on the floor and walk around it for a week before committing.
- Light it properly. Every island needs dedicated overhead lighting—pendant lights, a linear chandelier, or recessed cans. Plan for one light fixture per 2–3 feet of island length.
- Match or contrast intentionally. Your island can match your perimeter cabinets exactly, or you can use a contrasting color or material for a furniture-like look. Avoid accidental near-matches that look like a mistake.
- Plan for power early. Running electrical after the island is built means tearing into finished floors. If there is any chance you will want outlets later, run conduit during construction.
- Think about traffic flow. The island should not block the kitchen work triangle (sink → stove → refrigerator). Position it so the cook can reach all three points without walking around the island.
Final Thoughts
A kitchen island is an investment that pays dividends in counter space, storage, and daily enjoyment of your kitchen. Whether you spend $300 on an IKEA hack or $10,000 on a custom installation with a waterfall quartz edge and integrated cooktop, the key is getting the dimensions, materials, and features right for your space and cooking style. Use the sizing tables and build plans above as your starting point, choose countertop and base materials that match your budget and aesthetic, and do not forget the details—quality drawer slides, proper hardware, and adequate electrical service will make the difference between an island you tolerate and one you love.
Frequently Asked Questions
Lumberama Team
Building Materials Experts
Contributor to Lumberama’s reference library. Read our editorial standards and source methodology.
Explore related resources
Where readers of this article usually go next.
Related Articles

Pressure Washing Guide: Cost, Tips & What to Clean
Restore your home's exterior with pressure washing.
Arbor & Trellis Guide: Types, Cost & DIY Ideas
Add vertical beauty to your garden.
Screen Porch Guide: Types, Cost & Design Ideas
Enjoy the outdoors without bugs.