Butcher Block Countertops: Buying Guide, Pros, Cons & Costs (2026)
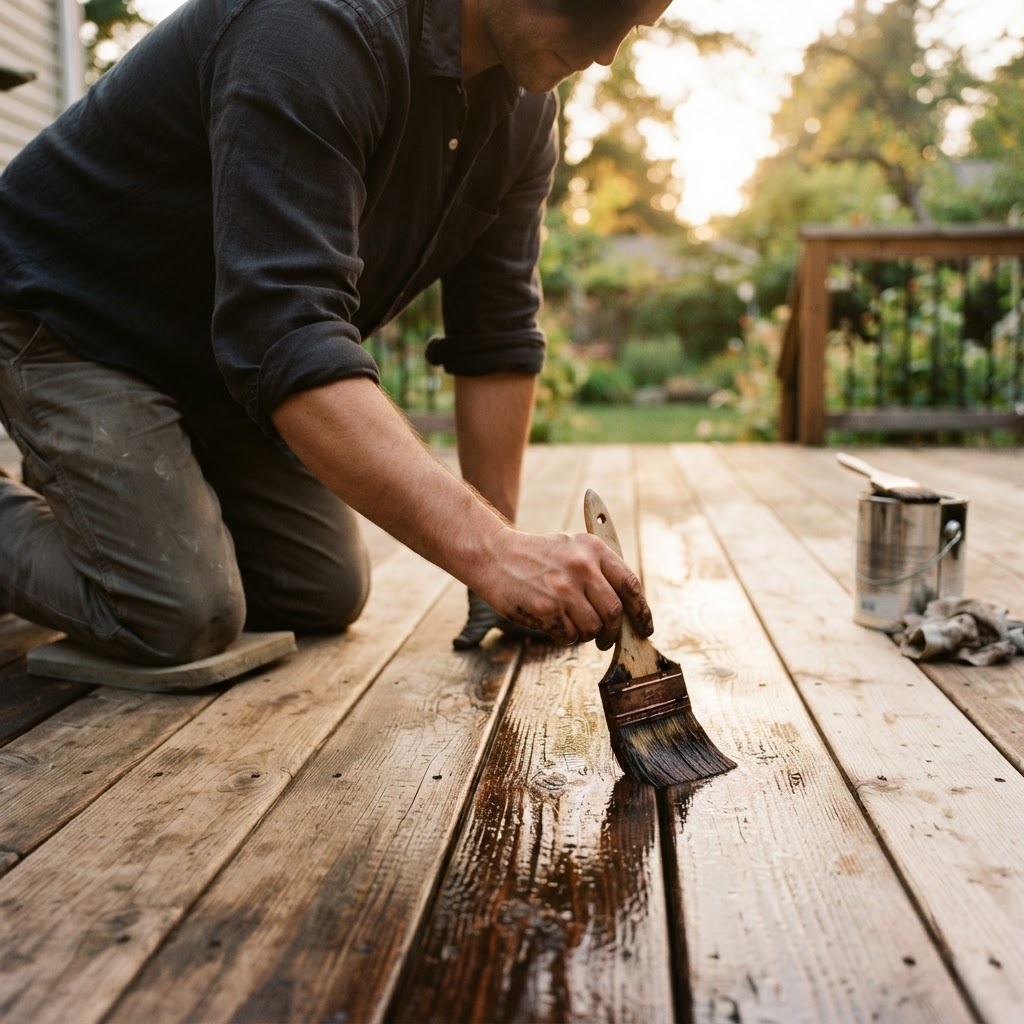
Butcher Block Countertops: The Complete Guide
Butcher block countertops have surged in popularity as homeowners seek warmth, character, and natural beauty in their kitchens. Unlike stone or engineered surfaces, wood countertops are a living material — they develop patina over time, can be sanded and refinished, and bring an organic warmth that no synthetic surface can replicate.
Whether you're planning a full kitchen renovation or adding a butcher block island as a statement piece, this guide covers everything you need to know: the best wood species, construction types, installation, maintenance, and real-world costs.
What Are Butcher Block Countertops?
Butcher block countertops are solid wood surfaces made by bonding strips or blocks of hardwood together into a thick, durable slab. Originally designed for commercial meat-cutting stations, modern butcher block has evolved into a versatile countertop option for residential kitchens.
Unlike wood veneer or laminate with a wood-print pattern, butcher block is solid wood all the way through — typically 1.5 to 3 inches thick. This means you can sand out scratches, refinish the surface, and even reshape edges over the life of the countertop.
Best Wood Species for Butcher Block
The wood species you choose determines durability, appearance, food safety, and cost. Here are the top choices:
Hard Maple (Sugar Maple)
- Janka Hardness: 1,450 lbf
- Cost: $40–$80 per square foot
- Best for: Primary kitchen countertops, food prep surfaces
Hard maple is the gold standard for butcher block. Its tight, closed grain resists bacteria penetration, and its exceptional hardness stands up to daily cutting and chopping. The light, creamy color brightens kitchens and pairs well with both modern and traditional cabinetry.
Black Walnut
- Janka Hardness: 1,010 lbf
- Cost: $70–$150 per square foot
- Best for: Statement islands, accent countertops
Black walnut delivers rich, chocolate-brown tones with dramatic grain patterns. While softer than maple, it's still plenty durable for most kitchen use. Walnut is the premium choice for homeowners who want a countertop that doubles as a conversation piece.
White Oak
- Janka Hardness: 1,360 lbf
- Cost: $50–$100 per square foot
- Best for: Farmhouse and transitional kitchens
White oak offers excellent hardness and a distinctive grain pattern with visible rays. Its closed-cell structure (tyloses) makes it naturally resistant to moisture — a significant advantage in kitchen environments. White oak's warm, honey tones deepen beautifully with age.
Cherry
- Cost: $55–$110 per square foot
- Best for: Traditional and warm-toned kitchens
Cherry starts as a light pinkish-brown and darkens dramatically with sun exposure, developing a rich, reddish patina over months. This natural aging process gives cherry butcher block a living quality that many homeowners love. It's softer than maple or oak, so it's best for areas with lighter use.
Teak
- Cost: $80–$200 per square foot
- Best for: Near-sink installations, outdoor kitchens
Teak is the ultimate moisture-resistant hardwood. Its natural oils repel water and resist decay, making it ideal for areas around sinks or in outdoor kitchen setups. Teak's golden-brown color and straight grain give it a clean, modern look.
Construction Types
How the wood strips are oriented affects both appearance and performance:
Edge Grain
Wood strips are bonded side by side with the edge (long, narrow face) facing up. This is the most common and affordable construction type. Edge grain shows a linear, striped pattern and offers good durability for everyday kitchen use. Most pre-made butcher block countertops use edge grain construction.
End Grain
Wood blocks are arranged with the end grain (the cross-section of the tree) facing up, creating a distinctive checkerboard pattern. End grain is the most forgiving surface for knife work — blades slip between the wood fibers rather than cutting across them, which is gentler on both the knife and the countertop. End grain is also self-healing to a degree, as the fibers close back up after cuts. It's the most expensive construction type, typically 50–100% more than edge grain.
Face Grain
Wide planks are laid flat with the widest face up, showcasing the wood's full grain pattern. Face grain produces the most dramatic, furniture-like appearance but is the least forgiving for cutting — knife marks show more readily. It's best used as a design surface rather than a daily cutting surface.
Butcher Block vs. Other Countertop Materials
| Feature | Butcher Block | Granite | Quartz | Laminate |
|---|---|---|---|---|
| Cost (per sq ft) | $40–$150 | $50–$200 | $55–$175 | $10–$40 |
| Durability | Good (refinishable) | Excellent | Excellent | Fair |
| Heat Resistance | Low (use trivets) | High | Moderate | Low |
| Maintenance | Regular oiling | Periodic sealing | Minimal | Minimal |
| Repairability | Excellent (sand & refinish) | Difficult | Difficult | Replace |
| Warmth/Character | Excellent | Good | Moderate | Low |
| Food Safety | Good (with proper care) | Excellent | Excellent | Good |
| Lifespan | 20–50+ years | 50+ years | 25–50 years | 10–20 years |
DIY Installation: Step by Step
Installing butcher block countertops is one of the more accessible DIY countertop projects. Here's how to do it right:
Step 1: Measure and Plan
Measure your cabinet tops carefully, accounting for overhang (typically 1 to 1.5 inches on the front edge). Create a cut plan on paper, noting any sink cutouts, cooktop openings, or corner seams.
Step 2: Acclimate the Wood
Bring the butcher block into your kitchen at least 48–72 hours before installation. Wood expands and contracts with humidity changes, so it needs to reach equilibrium with your indoor climate before you cut or install it.
Step 3: Cut to Size
Use a circular saw with a fine-tooth blade (60+ teeth) for straight cuts. For sink cutouts, drill starter holes at the corners and use a jigsaw. Always cut with the finished side facing down to minimize tear-out.
Step 4: Sand and Finish
Sand the surface through progressive grits (120, 150, 220) before installation. Apply your chosen finish — mineral oil for food-contact surfaces, or a polyurethane/tung oil blend for non-food-contact areas.
Step 5: Install
Set the countertop on the cabinets and check for level. Secure from underneath using L-brackets or figure-8 fasteners screwed into the cabinet frames. Use slotted screw holes to allow for wood movement — never rigidly fasten butcher block, as it needs room to expand and contract seasonally.
Step 6: Seal Seams and Edges
If your countertop has seams, apply a bead of food-safe silicone between the joined sections. Seal any edges around sinks or cooktops with silicone as well to prevent moisture infiltration.
Step 7: Final Finish
Apply 2–3 coats of food-grade mineral oil to all surfaces, including the underside and edges. Let each coat soak in for 20–30 minutes, then wipe off the excess.
Maintenance: Keeping Butcher Block Beautiful
Proper maintenance is the key to long-lasting butcher block countertops.
Oiling Schedule
- First month: Oil every week (new butcher block is thirsty)
- Months 2–6: Oil every 2 weeks
- After 6 months: Oil monthly or whenever the surface looks dry
- Quick test: Sprinkle water on the surface. If it beads up, the finish is good. If it soaks in, it's time to oil.
Use food-grade mineral oil or a mineral oil/beeswax blend. Avoid vegetable oils (olive, coconut, etc.) as they can turn rancid.
Daily Care
- Wipe up spills immediately, especially acidic liquids like lemon juice or vinegar
- Clean with mild dish soap and a damp cloth
- Dry thoroughly after cleaning
- Use cutting boards for heavy prep work to minimize surface wear
Annual Maintenance
- Sand out any deep scratches or stains with 220-grit sandpaper
- Re-oil the entire surface after sanding
- Check and re-seal around sinks and seams
Butcher Block Island Ideas
A butcher block island is the most popular way to incorporate wood countertops without committing to an entire kitchen. Here are ideas that work:
Contrasting Material Pairing: Install butcher block on the island while using quartz or granite on perimeter counters. The wood island becomes a warm focal point that breaks up the harder surfaces.
Waterfall Edge Island: Extend the butcher block over the side of the island to create a dramatic waterfall edge. End grain construction works especially well for this look.
Integrated Cutting Station: Designate one section of the island as a dedicated cutting area with end grain construction, while the rest uses edge grain for everyday tasks.
Live Edge Accent: Use a live-edge walnut or maple slab for the island to create a rustic, one-of-a-kind centerpiece. Live edge pieces typically require custom fabrication.
Cost Calculator
For a standard 30-square-foot kitchen island, expect to spend:
- Hard Maple (edge grain): $1,200–$2,400
- White Oak (edge grain): $1,500–$3,000
- Black Walnut (edge grain): $2,100–$4,500
- End grain (any species): Add 50–100% to the above
- Professional installation: Add $500–$1,500
Need to figure out exactly how much material you'll need? Use our board foot calculator to convert your measurements into the lumber quantities you'll need to order.
Final Thoughts
Butcher block countertops reward homeowners who appreciate natural materials and don't mind a little regular maintenance. They're one of the few countertop surfaces that actually improve with age — developing character, warmth, and patina that stone and engineered surfaces simply can't match. Whether you go with the classic durability of hard maple or the dramatic beauty of black walnut, a well-maintained butcher block countertop can last decades and become a true centerpiece of your kitchen.
Frequently Asked Questions
Lumberama Editorial Team
Building & Woodworking Experts
Contributor to Lumberama’s reference library. Read our editorial standards and source methodology.
Explore related resources
Where readers of this article usually go next.
Related Articles
Wainscoting Guide: Types, Cost & Installation Ideas
Add classic charm and protection to your walls.

Trim & Baseboard Guide: Types, Cost & Installation
Finish your rooms with the perfect trim.
Crown Molding Guide: Types, Cost & Installation
Add elegance to any room with crown molding.