Outdoor Dining Table: DIY Plans, Wood Choices & Build Guide
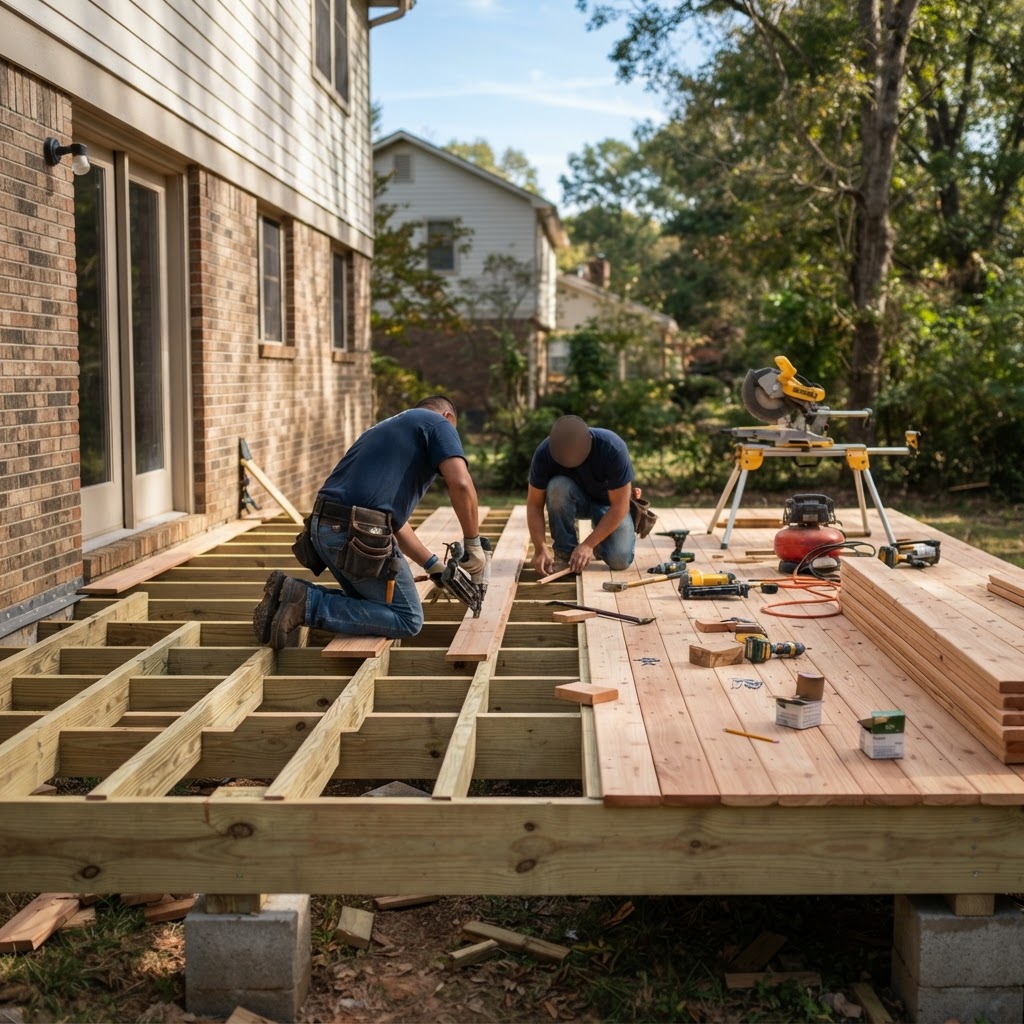
The Case for a Great Outdoor Dining Table
An outdoor dining table transforms a deck, patio, or backyard into an extension of your living space. It is where summer dinners happen, where weekend breakfasts are better because of the fresh air, and where holiday gatherings expand beyond the walls of your dining room. But outdoor furniture faces punishing conditions—UV radiation, rain, temperature swings from freezing to 100°F, and exposure to insects and fungal decay. Choosing the right material and building (or buying) with outdoor-specific techniques is the difference between a table that lasts two summers and one that lasts two decades.
This guide covers the best wood species for outdoor dining tables, compares wood to metal and concrete, walks through popular table styles and standard sizes, explains joinery techniques purpose-built for outdoor furniture, details weatherproofing and finishing protocols, and includes a complete DIY farmhouse table plan with a full materials list and cut sheet.
Best Wood Species for Outdoor Dining Tables
Teak
Teak is the benchmark for outdoor wood furniture worldwide. It contains natural oils and rubber that repel water, resist rot, and deter termites and marine borers. Teak's Janka hardness of 1,070 lbf provides excellent dent resistance for a dining surface, and it is dimensionally stable—meaning it shrinks and swells very little with humidity changes, which prevents warping and joint failure outdoors. Left unfinished, teak weathers to a silver-gray patina that many homeowners love. You can also maintain the golden-brown color with annual teak oil applications. Downside: teak is expensive ($15–$30 per board foot) and increasingly sourced from plantations, so verify sustainable sourcing when purchasing.
Cedar
Western red cedar is a North American favorite for outdoor projects. Its natural extractives (thujaplicins) give it excellent rot and insect resistance at a fraction of teak's cost ($5–$10 per board foot). Cedar is lightweight and easy to work with hand or power tools, making it ideal for DIY builders. The warm reddish-brown color is beautiful fresh, though it will gray within a year without UV protection. Cedar is softer (Janka 350) than teak, so it will show wear from plates, glasses, and everyday use more quickly. A quality exterior finish is essential.
Redwood
Redwood (specifically the heartwood) is naturally resistant to rot, decay, and insects thanks to its tannin content. It has a rich reddish color, straight grain, and moderate hardness (Janka 420). Redwood is more expensive than cedar ($8–$18 per board foot) and availability varies by region—it is most accessible on the West Coast. Like cedar, redwood must be finished to maintain its color outdoors.
Ipe (Brazilian Walnut)
Ipe is extraordinarily hard (Janka 3,510) and dense enough to sink in water. It resists rot, insects, fire, and UV degradation better than virtually any other wood. Ipe decks and furniture can last 40–75 years with minimal maintenance. The trade-offs are significant: ipe is expensive ($10–$25 per board foot), extremely difficult to cut and drill (carbide-tipped tools are mandatory, and pre-drilling for every fastener is required), and heavy—a 6-foot ipe table can weigh over 200 pounds. It is a premium choice for a permanent outdoor table.
Acacia
Acacia has gained popularity as a more affordable tropical hardwood for outdoor furniture. It is dense (Janka 1,750–2,300 depending on species), naturally rot-resistant, and features striking grain patterns with warm golden to dark brown colors. Acacia is the wood used in most mid-range outdoor furniture sold at retailers. It requires regular oiling to prevent surface checking and should be brought under cover or covered during winter in cold climates. Cost: $5–$12 per board foot.
Cypress
Bald cypress heartwood contains cypressene, a natural preservative that resists rot and insects. It is lighter than most tropical hardwoods, moderately hard (Janka 510), and available throughout the southeastern United States at $4–$8 per board foot. Cypress is an excellent value choice for outdoor tables—more durable than cedar, more affordable than teak, and readily available in thick planks suitable for tabletops.
Pressure-Treated Pine
Pressure-treated southern yellow pine is the most affordable option ($2–$4 per board foot) and is readily available in dimensional lumber sizes at any home center. Modern treatment chemicals (MCA and ACQ) are considered safe for outdoor furniture. Pressure-treated pine works best for table bases, legs, and structural components. For the tabletop, many builders prefer to use a higher-quality species and reserve PT pine for the undercarriage. Let PT lumber dry for 2–3 months before applying finish.
Wood vs. Metal vs. Concrete
| Material | Weight | Durability | Warmth / Feel | Maintenance | Cost |
|---|---|---|---|---|---|
| Wood | Medium to heavy | 10–75 years depending on species | Warm, natural, comfortable to touch | Refinish every 1–3 years | $200–$2,000+ DIY |
| Aluminum | Very light | 20+ years | Cool, modern, can be cold to touch | Minimal—wash and dry | $300–$1,500 |
| Wrought Iron | Very heavy | 30+ years | Cold, formal, traditional | Repaint to prevent rust every 2–4 years | $400–$2,000 |
| Concrete | Extremely heavy | 50+ years | Cold, industrial | Seal every 1–2 years | $500–$3,000+ DIY |
Wood wins on warmth, comfort, and character. Nothing else feels as inviting for a table where people gather, eat, and linger over conversation. Metal frames with wood tops offer a popular hybrid—combining the structural durability of steel or aluminum with the surface warmth of real wood.
Outdoor Dining Table Styles
Farmhouse Table
The farmhouse style features a thick plank top (typically 1.5–2 inches), chunky legs (often 4x4s), a trestle or apron base, and a rustic finish that shows the wood grain. Farmhouse tables seat large groups and look at home on covered porches, patios, and in outdoor kitchens. They are the most popular style for DIY builders because the chunky proportions are forgiving and the joinery is straightforward.
Modern / Clean-Line Table
Modern outdoor tables feature thin profiles, geometric legs (often steel hairpin or tapered wood), and smooth, highly finished surfaces. The wood is typically a tight-grained species like teak or ipe, finished with a satin or matte topcoat that minimizes grain texture. Edges may be eased or beveled rather than rounded.
Picnic Table
The classic picnic table with attached benches is the most space-efficient outdoor dining option. A standard 6-foot picnic table seats 6–8 people using minimal footprint because the benches tuck under the table. Picnic tables are among the simplest outdoor furniture projects to build—a basic plan requires only 2x6 and 2x4 lumber, carriage bolts, and deck screws.
Round Table
Round tables promote conversation because everyone faces the center. They work well on circular patios and in smaller outdoor dining areas. A 48-inch round table seats 4 comfortably; a 60-inch table seats 6. Round tabletops can be built from edge-glued planks cut with a router and trammel, or from a single large slab if you can source one.
Extension Table
An extension table includes a leaf or butterfly mechanism that allows you to expand the table for larger gatherings. Outdoor extension tables are less common than indoor versions because the mechanisms must be weather-resistant (stainless steel or marine-grade hardware). Teak extension tables are available from outdoor furniture manufacturers and are a smart choice for homeowners who entertain groups of varying sizes.
Standard Outdoor Dining Table Sizes
| Guests | Shape | Minimum Dimensions | Comfortable Dimensions |
|---|---|---|---|
| 4 | Rectangular | 30" x 48" | 36" x 48" |
| 4 | Round | 42" diameter | 48" diameter |
| 6 | Rectangular | 36" x 60" | 36" x 72" |
| 6 | Round | 54" diameter | 60" diameter |
| 8 | Rectangular | 36" x 84" | 40" x 96" |
| 10 | Rectangular | 40" x 108" | 42" x 120" |
Outdoor Joinery Techniques
Outdoor furniture joints must withstand wood movement caused by moisture and temperature cycles. Rigid joints that work indoors (like tight mortise-and-tenon glue joints) can crack or split as outdoor wood expands and contracts seasonally.
Best Joints for Outdoor Furniture
- Mortise and tenon with drawbore pins — the strongest traditional joint for outdoor furniture. The offset pin compresses the joint mechanically, so it stays tight even if glue fails. Use marine epoxy rather than PVA glue.
- Half-lap joints — simple, strong, and provide large glue surfaces. Excellent for aprons and stretchers.
- Pocket screws with stainless steel screws — fast and strong. Use coarse-thread stainless steel pocket screws for softwoods, fine-thread for hardwoods. The screw provides clamping force even without glue.
- Through-bolts with washers — the best choice for joints that must be disassembled (like legs that come off for winter storage). Use stainless steel carriage bolts or hex bolts with washers on both sides.
Fastener Rules for Outdoor Furniture
- Always use stainless steel (316 for coastal, 304 for inland) or coated structural screws. Standard zinc-plated screws will rust and stain the wood within one season.
- Pre-drill every hole in hardwoods like ipe and teak. Even in softwoods, pre-drilling prevents splitting at board ends.
- Avoid mixing metals — galvanic corrosion occurs when dissimilar metals contact each other in the presence of moisture.
Weatherproofing and Finishing
No wood is completely maintenance-free outdoors. Even teak and ipe will gray and surface-check without periodic care. Here is a finishing protocol that maximizes the lifespan of any outdoor dining table.
Step-by-Step Finishing Process
- Sand to 120–150 grit. Do not go finer—outdoor finishes need some tooth to grip.
- Apply a wood brightener (oxalic acid solution) if the wood has already grayed. Rinse thoroughly and let dry.
- Apply a penetrating oil or sealer. For teak, use teak oil. For other species, use a penetrating exterior wood sealer with UV inhibitors. Apply liberally, let soak for 15–20 minutes, wipe off excess.
- Apply 2–3 coats of marine-grade spar varnish or exterior polyurethane for maximum protection. Spar varnish flexes with wood movement and contains UV blockers that prevent graying. Sand lightly with 220 grit between coats.
- Alternatively, use an exterior penetrating oil-only finish (no film-forming topcoat) for a more natural, matte look. This requires more frequent reapplication (every 6–12 months) but is easier to maintain because you never need to strip old finish.
For detailed product recommendations, see our wood sealer guide and deck stain guide.
Maintenance by Wood Type
| Species | Finish Reapplication | Special Notes |
|---|---|---|
| Teak | Every 12–18 months (oil) or let gray | Do not use linseed oil; use teak-specific oil |
| Cedar | Every 12 months (oil or stain) | UV protection is critical to prevent graying |
| Redwood | Every 12 months (oil or stain) | Similar to cedar; heartwood only for outdoor use |
| Ipe | Every 12–24 months (oil) or let gray | May need end-grain sealer to prevent checking |
| Acacia | Every 6–12 months (oil) | More prone to surface checking than teak |
| Pressure-treated pine | Every 12 months (stain + sealer) | Let dry 2–3 months before first finish |
DIY Farmhouse Outdoor Dining Table Plan
This plan builds a sturdy 72" x 36" farmhouse table that seats 6 comfortably. It uses cedar for the top and structural components.
Materials List
- 5 — 2x6 x 8' cedar boards (tabletop planks)
- 2 — 4x4 x 8' cedar posts (legs)
- 2 — 2x6 x 8' cedar boards (aprons — long sides)
- 2 — 2x4 x 8' cedar boards (aprons — short sides + center stretcher)
- 2 — 2x4 x 8' cedar boards (breadboard ends + support cleats)
- Stainless steel pocket screws — 2½" coarse thread, box of 50
- Stainless steel carriage bolts — ½" x 5", qty 8 (for leg-to-apron connections)
- Stainless steel washers and nuts for carriage bolts
- Exterior wood glue (Titebond III or marine epoxy)
- Exterior wood stain or oil of your choice
- Marine-grade spar varnish or exterior polyurethane — 1 quart
Cut List
| Part | Qty | Dimensions | Material |
|---|---|---|---|
| Tabletop planks | 5 | 1.5" x 5.5" x 72" | 2x6 cedar |
| Legs | 4 | 3.5" x 3.5" x 28.5" | 4x4 cedar |
| Long aprons | 2 | 1.5" x 5.5" x 60" | 2x6 cedar |
| Short aprons | 2 | 1.5" x 3.5" x 29" | 2x4 cedar |
| Center stretcher | 1 | 1.5" x 3.5" x 60" | 2x4 cedar |
| Breadboard ends | 2 | 1.5" x 3.5" x 36" | 2x4 cedar |
| Tabletop cleats | 3 | 1.5" x 3.5" x 27" | 2x4 cedar |
Build Steps
- Build the tabletop. Lay five 2x6 planks side by side. Align the end grain in alternating directions to minimize cupping. Join with pocket screws every 12 inches along the underside, pulling each joint tight. Alternatively, use dowels or biscuits with exterior glue. Trim ends square with a circular saw and straightedge.
- Attach breadboard ends. Fasten a 2x4 breadboard across each short end of the tabletop using elongated pocket-screw holes (to allow seasonal wood movement) or tongue-and-groove with pinned slots. Breadboard ends prevent the tabletop from cupping and give a finished look.
- Build the base. Cut four legs from 4x4 posts. Attach long aprons to legs using two carriage bolts per joint (drill through the apron and into the leg; insert bolt, washer, and nut). Attach short aprons at each end the same way. Add a center stretcher between the two long aprons at mid-height for rigidity, secured with pocket screws or half-lap joints.
- Attach the tabletop to the base. Use tabletop fastener clips (figure-8 fasteners or z-clips) that allow the top to expand and contract across its width. Screw the clips to the aprons and into the underside of the top. Do not glue the top to the base—this will cause cracking as the wood moves seasonally.
- Sand and finish. Sand the entire table to 120 grit. Apply your chosen exterior stain or oil, let dry per manufacturer instructions, then apply 2–3 coats of spar varnish. Pay extra attention to end grain and the underside of the top.
Estimated Cost
- Cedar lumber for this project runs approximately $150–$250 depending on your region. Hardware adds $40–$
- 6
- Finish materials add $30–$
- 5
- Total: approximately $220–$360 for a table that would retail for $800–$1,500.
Common Mistakes to Avoid
- Using interior glue outdoors. Standard yellow wood glue (Titebond Original, Titebond II) is not waterproof. Use Titebond III (waterproof) or marine epoxy for outdoor joints.
- Skipping the underside finish. Moisture enters from below as well as above. Finish all surfaces, including the underside of the tabletop and the inside faces of aprons.
- Not allowing for wood movement. A 36-inch-wide tabletop can expand and contract by ¼ to ½ inch seasonally. Rigid attachments (like screwing directly through the apron into the top) will cause splits. Use figure-8 fasteners or z-clips.
- Setting legs directly on wet ground. Place furniture pads, rubber feet, or small tile squares under each leg to prevent wicking moisture from concrete or earth.
- Forgetting about the chairs. Before building your table, make sure you have enough covered storage to protect chairs during the off-season, or choose chairs in a material (like aluminum or synthetic wicker) that can stay out year-round.
Final Thoughts
An outdoor dining table is one of the most rewarding woodworking projects you can take on. The right wood species—teak for longevity, cedar for value, ipe for indestructible performance—paired with outdoor-rated joinery and a proper finish will give you a table that serves your family for decades. Use the sizing chart to match your table to your guest count, follow the farmhouse plan for a proven build, and remember that the most important step is the finish: seal every surface, reapply annually, and cover the table when it is not in use. Your outdoor dining table is not just furniture—it is where memories are made.
Frequently Asked Questions
Lumberama Team
Building Materials Experts
Contributor to Lumberama’s reference library. Read our editorial standards and source methodology.
Continue researching decking
Where readers of this article usually go next.
Related Articles
Chicken Coop Guide: How to Build, Cost & Plans
Start your backyard flock with this comprehensive coop building guide.
Pressure Washing Guide: Cost, Tips & When to Wash
Restore your home's exterior with this power washing guide.
Cabinet Guide: Types, Cost & How to Choose Kitchen Cabinets
Find the right cabinets for your kitchen remodel.