Sandbox Plans: How to Build a Kids Sandbox Step by Step
Why Build a Sandbox
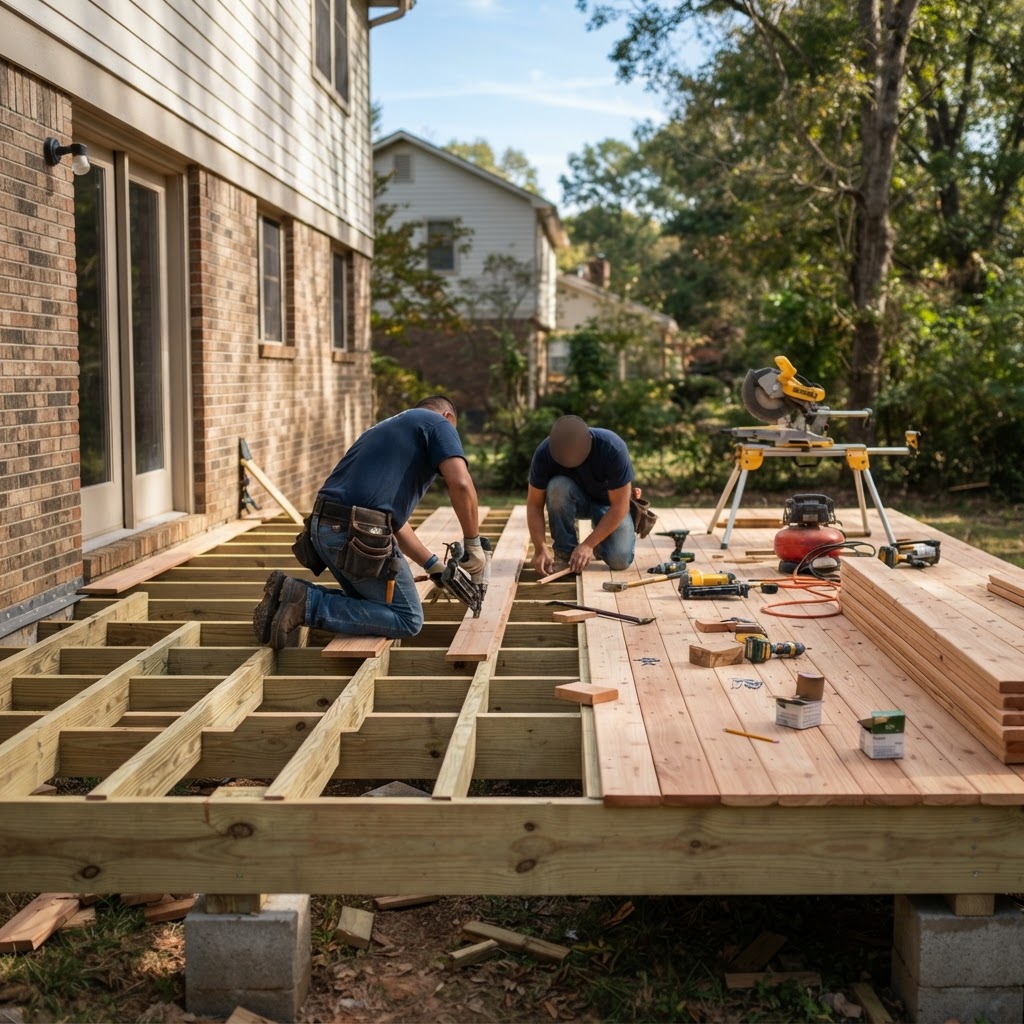
A sandbox is one of the best backyard additions for families with young children. It provides hours of open-ended, imaginative play that develops fine motor skills, encourages creativity, and keeps kids engaged outdoors. Building one yourself is a straightforward weekend project that costs a fraction of commercial play sets, produces a higher-quality result, and gives you the satisfaction of creating something your children will use and love for years.
Unlike a store-bought plastic sandbox, a well-built wooden sandbox looks great in your yard, lasts for many seasons, and can be customized in size, shape, and features to fit your space and your children's needs. This guide covers every aspect of planning and building a sandbox, from choosing the right type and wood to a complete step-by-step build for a 6x6 cedar sandbox with a hinged bench lid.
Sandbox Types
Before you start building, choose the sandbox style that best fits your yard, your children's ages, and your woodworking comfort level.
Basic Frame Sandbox
The simplest sandbox is a rectangular frame made from stacked lumber, set on landscape fabric, and filled with sand. It requires only basic cutting and fastening skills and can be built in a few hours. A basic 4x4 or 6x6 frame uses two or three courses of 2x6 or 2x8 boards stacked and screwed together at the corners. Add corner seat boards (a piece of lumber across each corner) for kids to sit on while they play. This design is ideal for a first build or when you want to get a sandbox up quickly.
Covered or Lidded Sandbox
A sandbox with a cover or lid keeps sand clean and dry when not in use, dramatically reducing maintenance and preventing animals from using it as a litter box. The most popular design is a hinged lid that folds back to become built-in bench seating. When closed, the lid panels cover the entire sandbox. When opened, each half folds up and back to form a bench with a backrest on two sides of the sandbox. This dual-purpose design is the one we will build in our step-by-step guide below.
Ship-Shaped Sandbox
A pirate ship or sailboat sandbox adds dramatic play value by giving kids a themed setting for their imagination. The basic construction is a rectangular frame with pointed bow and stern extensions, a mast made from a 4x4 post, and optional side rails. Ship sandboxes require more cutting (especially the angled bow) and more material, but the result is a show-stopping play feature. They work best in larger yards where the elongated shape (typically 4x10 or larger) has room to fit.
Picnic Table Combo
A sandbox integrated with a small picnic table gives children a sand play area and a solid surface for snacks, art projects, and water play all in one structure. The typical design places a shallow sandbox (8-10 inches deep) in the center of a kid-sized picnic table, with bench seats on two sides and the sand area in the middle where the table top would normally be. A removable lid covers the sand section to convert it into a regular table when sand play is done.
Hexagonal Sandbox
A hexagonal (six-sided) sandbox offers a distinctive look and provides more usable play area per foot of perimeter than a square sandbox, giving kids more room to spread out. The six-sided shape also eliminates corner seat boards in favor of flat seat sections on each side. Construction requires compound miter cuts at each joint (30-degree miters for a hexagon), making it a moderately advanced project. Typical sizes range from 7 to 10 feet across.
Choosing the Best Wood
The wood you choose for a sandbox must be durable enough to withstand constant ground contact and weather exposure, safe for children who will touch it constantly, and resistant to splintering.
Cedar
Cedar is the top choice for sandbox construction and the wood we recommend for this project. Cedar heartwood contains natural oils (thujaplicins) that make it inherently resistant to rot, decay, fungi, and insect damage without any chemical treatment. This natural durability is especially important for a children's play structure where you want to minimize chemical exposure. Cedar is also one of the most dimensionally stable softwoods, meaning it swells and shrinks less than most lumber as it absorbs and releases moisture through seasonal changes. This stability means your sandbox frame stays square and tight over the years. Cedar resists splintering better than most construction lumber, an important safety consideration for little hands. And it looks beautiful, whether left to weather naturally to a warm silver-gray or finished with a clear wood sealer or light stain to preserve the warm honey-brown color.
Redwood
Redwood heartwood offers natural durability comparable to cedar. Its rich reddish-brown color is striking, and it shares cedar's resistance to rot, insects, and splintering. Redwood is an excellent sandbox wood but is more expensive than cedar and less widely available outside the western United States. If you have access to redwood at a reasonable price, it makes a beautiful, long-lasting sandbox.
Pressure-Treated Lumber
- Modern pressure-treated lumber uses MCA (micronized copper azole) or ACQ (alkaline copper quaternary) preservatives that are considered safe for residential use, including playground equipment, by the EPA. The old CCA (chromated copper arsenate) formulation was phased out for residential use in
- 2
- 0
- 0
- If you choose pressure-treated lumber for a sandbox, use it for the bottom course that contacts the ground and seal all surfaces with a penetrating wood sealer to encapsulate the surface and minimize any chemical migration. Many parents prefer to avoid pressure-treated wood in sandboxes altogether, which is why cedar is the standard recommendation.
Wood to Avoid
Do not use standard untreated pine, spruce, or fir for sandbox construction. These species rot quickly in ground contact, often within 2-3 years. Pallet wood is also unsuitable since it may have been treated with chemicals for shipping and is often low-quality, splintery wood. Plywood and OSB delaminate rapidly when exposed to moisture and should not be used for the sandbox frame.
Standard Sizes and Sand Quantity
Choose a sandbox size based on the number of children who will play simultaneously and the available space in your yard.
| Sandbox Size | Play Area | Best For | Sand Needed (12" deep) | Sand Weight |
|---|---|---|---|---|
| 4x4 ft | 16 sq ft | 1-2 toddlers | 0.6 cubic yards | ~1,600 lbs |
| 5x5 ft | 25 sq ft | 1-2 children | 0.9 cubic yards | ~2,400 lbs |
| 6x6 ft | 36 sq ft | 2-3 children (most popular) | 1.3 cubic yards | ~3,500 lbs |
| 8x8 ft | 64 sq ft | 3-4 children, large play area | 2.4 cubic yards | ~6,400 lbs |
Sand Depth and Quantity Calculator
The formula for calculating sand volume is: Length (ft) x Width (ft) x Depth (ft) / 27 = Cubic Yards. Play sand weighs approximately 2,700 pounds per cubic yard. For sandboxes larger than 4x4, buying sand in bulk (delivered by the cubic yard from a landscape supply company) is dramatically cheaper than buying bags from a home improvement store. A 50-pound bag of play sand fills about 0.5 cubic feet, so a 6x6 sandbox at 12 inches deep would require about 72 bags, which is both expensive and impractical compared to a bulk delivery.
Choosing the Right Sand
Use only sand specifically labeled as play sand for children's sandboxes. Play sand has been washed and screened to remove dust, clay, and organic matter, and it is tested for silica dust content. Natural play sand has rounded grains that pack well for building and feel pleasant on skin. Avoid masonry sand, decomposed granite, or beach sand, which may contain shell fragments, organic matter, or excessive fine dust.
Landscape Fabric and Drainage
Every sandbox needs a drainage layer underneath to prevent water from pooling and creating a muddy, unsanitary mess.
Why Landscape Fabric, Not Plastic
Install commercial-grade woven landscape fabric (not the thin spun-bond variety) as the bottom liner. Landscape fabric allows rainwater to drain through into the soil below while blocking weeds from growing up into the sand. Never use plastic sheeting, a tarp, or any non-permeable material as a sandbox liner. Trapped water under plastic creates standing puddles that breed mosquitoes, promote mold and bacterial growth, and make the sand swampy and unusable after rain.
Installation
Cut the landscape fabric at least 12 inches larger than the sandbox in each direction. After building the frame, staple the fabric to the inside bottom edge of the frame boards, allowing it to drape across the ground underneath. The fabric should extend 6 inches beyond the frame on all sides to prevent weeds from encroaching under the edges. If your site has poor drainage or clay soil, excavate 4-6 inches below the sandbox area and fill with a layer of pea gravel before laying the landscape fabric on top. This gravel layer provides a drainage reservoir that keeps the sand drier after heavy rain.
Cover and Lid Designs
A sandbox cover is not optional. Without a cover, your sandbox will become a neighborhood cat litter box, fill with leaves and debris, and stay soggy after every rain. Here are the most practical cover options.
Hinged Bench Lid (Recommended)
This is the most popular and functional sandbox cover design. The lid consists of two panels of deck boards connected by hinges. When closed, the panels sit flat and cover the sandbox completely. When opened, each panel folds back on its hinges and the upper section becomes a backrest while the lower section becomes a seat. You get a fully covered sandbox and built-in bench seating in one design with no separate cover to store or lose. Our step-by-step build below includes this lid.
Rolling Cover
A rolling cover uses slats connected by flexible straps that roll up like a tambour door. The cover rolls off the sandbox onto a take-up roller at one end. Rolling covers are convenient because you can partially open the sandbox, and they do not require the clearance behind the sandbox that a hinged lid needs when folded open. However, they are more complex to build and the flexible connections can wear over time.
Tarp with Bungee Cords
A heavy-duty tarp or sandbox cover secured with bungee hooks is the simplest and cheapest cover option. It keeps rain and animals out effectively but does not provide the convenience or aesthetics of built-in seating. The tarp must be removed and stored somewhere each time the sandbox is used. Choose a UV-resistant tarp in a dark color that discourages animals. Mesh tarps allow water to pass through while blocking debris and animals, eliminating puddling on the cover surface.
Safety Considerations
A few planning decisions make your sandbox significantly safer for children.
Location
Place the sandbox where you can see it from inside the house (kitchen or living room window) so you can supervise play easily. Choose a spot with partial shade, either from a tree, fence, or structure, or plan to add a shade sail or umbrella. Sand in full sun becomes uncomfortably hot in summer and can burn small hands and feet. Avoid placing the sandbox directly under trees that drop sap, seeds, or excessive leaves, as these contaminate the sand quickly.
Shading
If natural shade is not available, install a shade structure. A simple shade sail attached to posts at the corners of the sandbox is inexpensive and effective. A pergola or canopy over the sandbox provides more permanent shade. UV-rated shade cloth blocks 70-90% of harmful UV radiation while allowing airflow. If you are considering a larger play area, a treehouse or elevated play structure can incorporate shade for the sandbox below.
Maintenance Schedule
- Before each play session: Remove any visible debris, leaves, or foreign objects. Check for insects.
- Weekly: Rake the sand to break up clumps, distribute moisture evenly, and expose subsurface sand to sunlight for natural sanitization.
- Monthly: Inspect all wood surfaces for splinters. Sand any rough spots with 80-grit sandpaper. Check fasteners for tightness and any protruding screw heads.
- Annually: Top off sand level as needed. Sand settles and is lost to play over time. Apply a fresh coat of wood sealer or stain if you finished the wood.
- Every 1-2 years: Replace all the sand. Even well-maintained sand eventually accumulates enough organic matter and microbial growth to warrant replacement.
Step-by-Step Build: 6x6 Cedar Sandbox with Bench Lid
This is the project. A 6x6-foot cedar sandbox with a hinged lid that folds open to become bench seating on two sides. It is the most popular sandbox design for good reason: it looks great, functions perfectly, and protects the sand when not in use.
Materials List
| Material | Quantity | Purpose |
|---|---|---|
| 2x8 cedar boards, 6 ft | 8 | Sandbox frame (2 courses of 4 boards each) |
| 1x6 cedar boards, 6 ft | 16 | Lid/bench slats (4 slats per panel, 4 panels) |
| 2x2 cedar strips, 6 ft | 8 | Lid support cleats |
| 3" exterior screws | 1 lb box | Frame assembly |
| 1-5/8" exterior screws | 1 lb box | Lid slat attachment |
| 3" galvanized butt hinges | 8 | Lid folding joints (2 per panel) |
| Landscape fabric, 8x8 ft | 1 piece | Weed barrier and drainage |
| Play sand | 1.3 cubic yards | Fill material |
Tools Needed
- Circular saw or miter saw
- Drill/driver with countersink bit
- Tape measure and carpenter's square
- Level (4 ft preferred)
- Staple gun with 1/2" staples
- Sandpaper (80 and 120 grit)
- Safety glasses and hearing protection
Step 1: Prepare the Site
Choose a level area in your yard with partial shade and good visibility from your home. Mark a 7x7-foot area (1 foot larger than the sandbox in each direction for landscape fabric overlap). Remove any grass, roots, and rocks from the marked area. Level the ground, removing high spots and filling low spots with tamped soil. If your soil drains poorly, excavate 4 inches deep across the entire area and fill with a layer of compacted pea gravel.
Step 2: Build the Frame
Cut all eight 2x8 boards to exactly 6 feet long if not already. Arrange the first course of four boards in a square on the prepared site, overlapping at the corners in a pinwheel pattern so each board overlaps one neighbor and is overlapped by the other. Pre-drill and drive two 3-inch exterior screws through each corner joint. Check the frame for square by measuring the diagonals. They should be equal. Adjust until square, then stack the second course on top with the corner overlaps reversed (opposite pinwheel direction from the first course) to create a strong, interlocking joint. Screw the second course to the first with two screws at each corner and one screw every 24 inches along the length.
Step 3: Level the Frame
Place a 4-foot level across the frame in both directions and diagonally. Dig down under high spots or shim under low spots until the frame sits perfectly level. A level frame is essential for the lid to close properly and for the bench seats to be comfortable.
Step 4: Install Landscape Fabric
Drape the landscape fabric across the inside of the frame and the ground beneath it, extending at least 6 inches beyond the frame on all sides. Staple the fabric to the inside face of the bottom course of boards every 6 inches. Fold and staple any excess fabric at the corners. The fabric should lie flat on the ground with no bunching that could create pockets where water collects.
Step 5: Build the Lid Panels
Each side of the sandbox that gets a lid consists of two panels of 1x6 boards. The inner panel (closest to the sand) is two 1x6 boards wide. The outer panel (farthest from the sand) is also two 1x6 boards wide. When closed, both panels lie flat across the sandbox frame, covering half the opening. When opened, the inner panel folds up to become the seat and the outer panel folds up behind it to become the backrest.
For each lid half, cut four 1x6 boards to match the sandbox frame length (6 feet). Arrange two boards side by side and connect them with two 2x2 cedar cleats screwed across the back, positioned about 6 inches from each end. Use 1-5/8-inch screws driven from the cleat side so no screw heads are exposed on the sitting surface. Repeat for the second pair of boards. Sand all surfaces and edges with 80-grit followed by 120-grit sandpaper, rounding over any sharp edges that small hands will contact.
Step 6: Attach the Lid with Hinges
The hinge arrangement is the key to the bench-folding function. Mount the inner panel to the sandbox frame using two 3-inch butt hinges. The hinge barrel should sit on top of the frame edge so the panel can fold up and away from the sandbox. Then connect the inner panel to the outer panel using two more hinges along their meeting edges. These hinges should be oriented so that when you lift the outer panel, it folds back and up, resting against the inner panel to form the backrest. The inner panel rotates up to become the seat, and the outer panel continues over to become the back. Test the folding action before final tightening. The panels should open and fold smoothly without binding. Repeat for the opposite side if desired, or leave two sides without lids for open access.
Step 7: Sand and Finish
Do a final sanding of the entire sandbox, paying special attention to any rough spots, end grain, and edges that children will touch. Round over all sharp corners with sandpaper. Cedar can be left unfinished and will weather to a natural silver-gray, or you can apply a clear exterior wood sealer to preserve the warm color. If staining, use an exterior penetrating stain in a child-safe formulation. Apply finish to all surfaces including the underside and end grain for maximum protection.
Step 8: Add Sand
Fill the sandbox with play sand to a depth of 12 inches, leaving at least 2 inches of frame height above the sand level to contain sand during active play. For a 6x6 sandbox, this requires approximately 1.3 cubic yards of play sand. Spread the sand evenly and allow it to settle for a day before play. Wet the sand lightly with a garden hose to help it compact and settle, then top off any low spots.
Sandbox Accessories
A few additions make your sandbox more fun and functional.
Sand Toys and Tools
Stock the sandbox with age-appropriate toys: buckets, shovels, molds, dump trucks, scoops, funnels, and sifters. A dedicated toy bin or hooks on the outside of the sandbox frame keep accessories organized and off the ground.
Shade Sail or Umbrella
If your sandbox does not have natural shade, install a shade sail on posts at the corners or place a large patio umbrella with a heavy base nearby. UV-rated shade fabric protects children from sun exposure during long play sessions.
Water Play Feature
A small water table or basin positioned next to the sandbox lets children mix sand and water for more creative play. Some sandbox designs incorporate a removable water trough along one edge. Keep water play supervised and drain the water after each session to prevent mosquito breeding.
Chalkboard Panel
Mount a framed piece of exterior chalkboard paint on one side of the sandbox for drawing and counting games. Or simply paint one smooth panel of the sandbox frame or lid with chalkboard paint.
Maintaining Your Sandbox Long-Term
A well-maintained cedar sandbox will last 10-15 years or more. Cedar's natural durability handles the ground contact and weather exposure, but a little annual attention keeps it looking and performing its best.
- Inspect all wood surfaces each spring for any splintering and sand smooth with 80-grit sandpaper.
- Check all screws and hinges for tightness. Replace any that are stripped or corroded.
- If you applied a sealer or stain, reapply according to the product's recommended schedule, typically every 1-2 years.
- Replace the sand every 1-2 years or sooner if it becomes contaminated or has a musty smell.
- Keep vegetation trimmed back from the sandbox perimeter to reduce insect habitat and improve air circulation.
- In winter, close the lid and consider placing a tarp over the top for additional protection if you live in a region with heavy snow or ice.
When your children outgrow the sandbox (typically around age 8-10), the cedar frame can be repurposed as a raised garden bed. Remove the sand, replace the landscape fabric if it has deteriorated, fill with garden soil, and plant vegetables or flowers. The cedar frame will last many more years in this second life.
Final Recommendations
Build your sandbox from cedar. The natural rot resistance, splinter resistance, and chemical-free safety make it the ideal sandbox wood. A 6x6-foot size works for most families, providing enough room for 2-3 children to play comfortably without dominating your yard. Invest the extra time to build the hinged bench lid since it solves the cover problem elegantly and adds comfortable seating. Use commercial landscape fabric underneath, fill with certified play sand to 12 inches deep, and commit to the simple maintenance schedule to keep the sandbox clean, safe, and fun for years of outdoor play.
Frequently Asked Questions
Lumberama Team
Building Materials Experts
Contributor to Lumberama’s reference library. Read our editorial standards and source methodology.
Explore related resources
Where readers of this article usually go next.
Related Articles

Chicken Coop Guide: How to Build, Cost & Plans
Start your backyard flock with this comprehensive coop building guide.
Pressure Washing Guide: Cost, Tips & When to Wash
Restore your home's exterior with this power washing guide.

Cabinet Guide: Types, Cost & How to Choose Kitchen Cabinets
Find the right cabinets for your kitchen remodel.