How to Install Deck Railing Posts: Secure Attachment Methods for Code Compliance
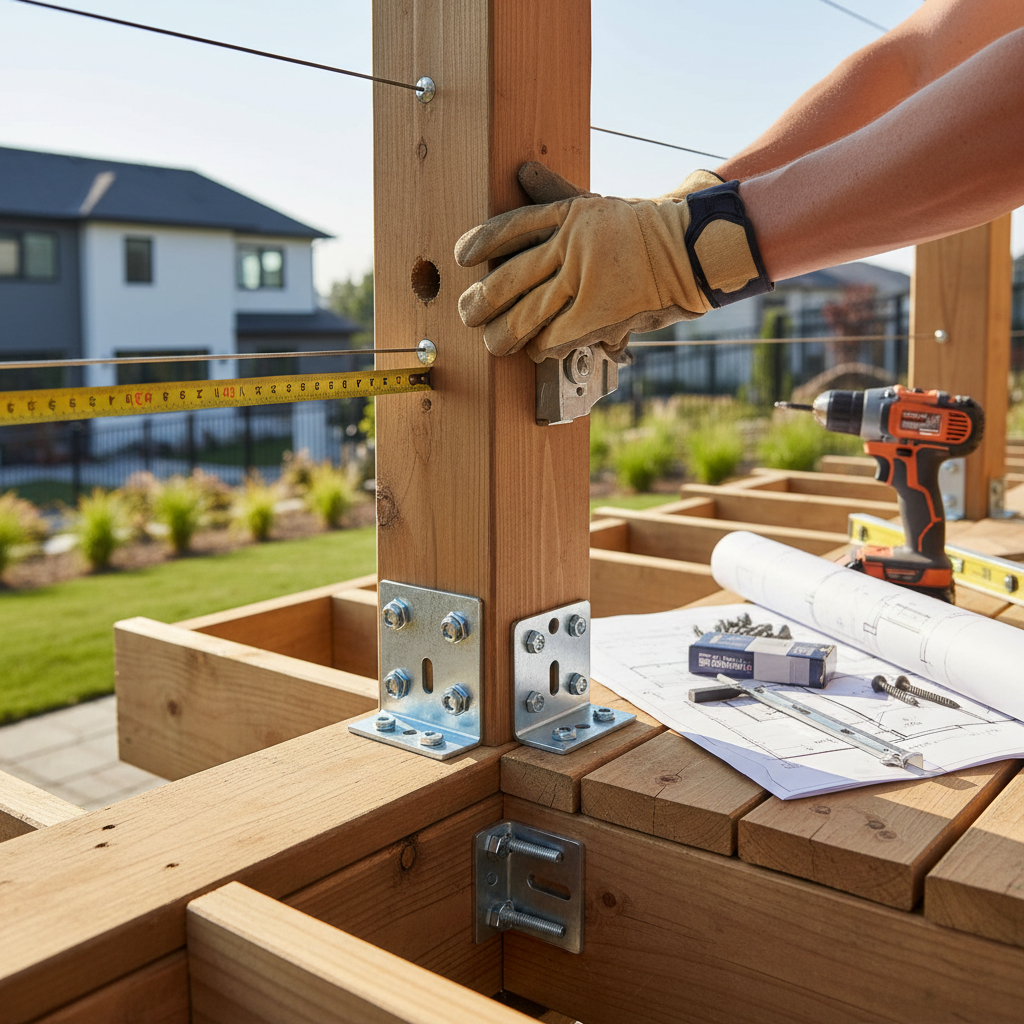
How to Install Deck Railing Posts: Secure Attachment Methods
Deck railings are one of the most critical structural elements on any elevated deck. The International Residential Code (IRC) requires railings to withstand 200 pounds of force applied in any direction at any point. A wobbly post that flexes when you lean on it is a code violation — and a potential liability.
Code Requirements First
Know these numbers before you start:
- When required: Railings required on decks 30 inches or more above grade
- Minimum height: 36" for decks less than 30" above grade; 42" for higher decks (check local code)
- Baluster spacing: Maximum 4" gap between balusters (a 4" sphere must not pass through)
- Post spacing: Maximum 6 feet center-to-center (most codes; some allow 8 feet with engineering)
- Rail graspability: Top rail must be graspable (round rails 1.25"–2" diameter)
Post Sizing
Minimum post size for wood railings:
- 4x4 posts for decks under 6 feet high with posts 6 feet OC or less
- 6x6 posts recommended for decks over 6 feet high or any situation where extra rigidity is desired
Material: Pressure-treated 4x4 or 6x6 (UC3B minimum for above-grade applications). Cedar or redwood are also excellent choices.
Attachment Methods
Method 1: Surface Mount Post Bases (Fastest, Permits Required)
Surface mount post bases (like the Simpson BC post base series) bolt to the outside or top surface of the rim joist. These are:
- Faster to install (no drilling through framing)
- Easier to replace individual posts
- Engineering-tested and load-rated by the manufacturer
- Accepted by most building departments when used as specified
Installation steps:
1. Mark post locations on the rim joist (outside face is the most common location)
2. Attach the post base hardware with the specified fasteners (typically 16d nails or 1/2"x3" structural screws per the manufacturer's spec sheet)
3. Insert the 4x4 post into the standoff and secure with the side fasteners
4. The standoff raises the post end grain off the decking surface for drainage
The limitation: Some inspectors in some jurisdictions do not accept surface mount bases for railing posts. Always confirm with your building department before choosing this method.
Method 2: Through-Bolt at Rim Joist (Strongest, Code Universally Accepted)
This method attaches the post by sandwiching the rim joist between the post and blocking on the inside face.
Materials per post:
- (2) 1/2" x 4.5" carriage bolts (hot-dipped galvanized)
- (2) 1/2" washers and nuts
- Blocking: a 4x4 block inside the rim joist matching the post location
Installation steps:
1. Cut the 4x4 post to final height plus extra for attachment (the post will be bolted to the outside of the rim joist, so the attachment zone is from deck level down about 6-8 inches)
2. Position post against the outside of the rim joist, checking for plumb
3. Drill two 9/16" holes through post and rim joist (staggered vertically, not in a horizontal line — this prevents splitting the rim joist)
4. Install blocking inside the rim joist at the same location and drill through to match
5. Drive carriage bolts through post, rim joist, and blocking
6. Apply washers and nuts and tighten firmly
Hole positioning: One bolt 1.5" from the top of the post-to-rim connection, the second bolt 1.5" from the bottom. Stagger them 1" horizontally so they're not in line with the grain.
Method 3: Notch and Bolt (Traditional, Very Rigid)
Notch the post to wrap around the outside edge of the rim joist and the deck frame. This creates a mechanical connection that's very resistant to racking.
1. Cut a 1.5" × 3.5" notch in the post at deck height
2. The notch receives the top edge of the rim joist and the outside joist
3. Clamp the post in place with the notch seated on the framing
4. Drive two 1/2" carriage bolts through the assembly
This method requires more post length below deck level (the notch zone needs 3–4 inches below the decking) and is more labor-intensive, but creates an exceptionally rigid post.
Installing the Rail System
Top and Bottom Rails
Attach top and bottom rails to the posts with rail brackets or pre-routed rail hardware. Standard decking rail systems use pre-routed top/bottom rails that accept the round or square balusters.
Rail span: Rails must not deflect more than L/180 under a 50 lb/ft lateral load. A standard 2x4 top rail can span 6 feet adequately; a 2x6 can span 8 feet.
Balusters
Install balusters spaced with no more than a 4" gap between them. Pre-drill baluster ends to prevent splitting.
Quick spacing tip: Cut a 3.5" spacer block from scrap. For 1.5" wide balusters, 3.5" spacers leave exactly 3.5" — well under the 4" maximum.
The Wiggle Test
After installation, grab the top of each post and apply firm lateral pressure (around 50–75 lbs). A properly installed post should have zero visible flex. If you feel movement:
- Check that all bolts are fully tightened
- Verify you've gone through both rim joist and blocking (or outer band joist)
- Add a third bolt or larger hardware if needed
Inspectors literally grab and push every post during inspections. A railing that wiggles will fail — and rightfully so.
Frequently Asked Questions
Tom Rodriguez
General Contractor
Contributor to Lumberama’s reference library. Read our editorial standards and source methodology.
Continue researching decking
Where readers of this article usually go next.
Related Articles
Deck Lighting Guide: Ideas, Types & How to Install
Transform your deck with the right lighting using this comprehensive guide.
Deck Lighting Guide: Types, Cost, Installation & Ideas
Illuminate your deck with the right lighting for safety, ambiance, and style.
Deck Railing Guide: Materials, Styles & Code
Choose the perfect deck railing with this comprehensive railing guide.