House Wrap and Weather-Resistive Barrier Guide (2026)
A weather-resistive barrier (WRB) is your home's critical second line of defense against water intrusion behind the cladding. Proper house wrap installation prevents moisture damage while allowing wall assemblies to dry outward. This guide compares WRB options, installation best practices, and the details that prevent costly water damage.
Key Takeaways
- A weather-resistive barrier (WRB) is your home's critical second line of defense against water intrusion behind the cladding.
- Proper house wrap installation prevents moisture damage while allowing wall assemblies to dry outward.
- This guide compares WRB options, installation best practices, and the details that prevent costly water damage.
- Choose based on your cladding type, climate, and budget.
- Standard house wrap works well with most siding types.
Types Overview
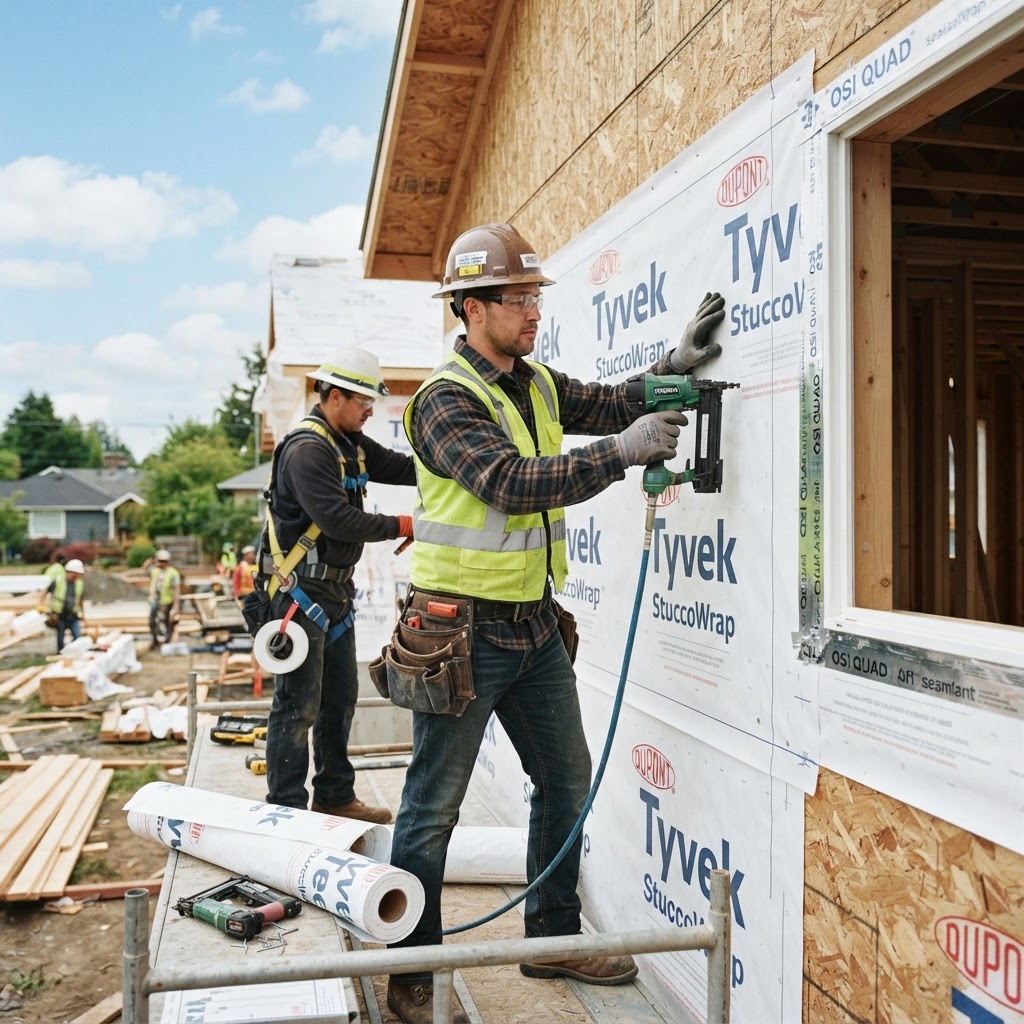
Mechanically-attached house wrap (Tyvek, Typar) is the most common WRB, stapled or nailed over sheathing. Self-adhered WRB membranes bond directly to sheathing for superior air sealing and water resistance. Fluid-applied WRB is rolled or sprayed onto sheathing for seamless, zero-gap coverage. Integrated sheathing systems (ZIP System) combine structural sheathing with a factory-applied WRB. Asphalt-saturated felt (tar paper) is the traditional WRB, still code-compliant and cost-effective. Drain wrap products add built-in drainage space behind cladding.
Selection Criteria
Choose based on your cladding type, climate, and budget. Standard house wrap works well with most siding types. Drain wrap or rainscreen products are recommended behind stucco and manufactured stone. Fluid-applied WRB provides the best air sealing and works well with irregular sheathing surfaces. ZIP System saves labor by combining sheathing and WRB in one step. Consider the WRB's permeability rating — higher perm allows better drying in cold climates.
Installation Guide
Install from bottom to top in shingle fashion with minimum 6-inch horizontal overlaps and 12-inch vertical overlaps. Tape all seams with manufacturer-approved tape. Integrate window and door openings with proper flashing — sill flashing first, then jamb flashing, then head flashing. Seal all penetrations including electrical, plumbing, and HVAC. Ensure the WRB is continuous from foundation to roof line. Do not trap moisture behind the barrier.
Code Requirements
IRC R703.2 requires a WRB behind all exterior cladding except those specifically designed without one. The WRB must comply with ASTM E2556, ASTM D226 (felt), or ICC-ES evaluation reports. Window and door flashing must integrate with the WRB per manufacturer instructions. Minimum one layer of WRB is required; some cladding types require two layers of felt (e.g., traditional stucco).
Cost Breakdown
Tyvek HomeWrap (9x150 roll): $150-$200 (covers 1,350 sq ft). Typar house wrap: $100-$150 per roll. Self-adhered WRB membrane: $1.00-$2.50 per square foot. Fluid-applied WRB: $0.75-$2.00 per square foot installed. ZIP System sheathing with tape: $25-$38 per 4x8 sheet. #15 asphalt felt: $20-$30 per roll (400 sq ft). Seam tape: $15-$30 per roll.
DIY vs Professional
House wrap installation is a manageable DIY project with a helper for large wall areas. The key is proper overlap sequencing and flashing details around openings. Fluid-applied WRB requires professional spray equipment. Window and door flashing integration is the most critical detail — study manufacturer instructions carefully. Errors in flashing cause the majority of water intrusion problems.
Common Mistakes to Avoid
Reverse-lapping — installing upper courses behind lower courses — directs water into the wall. Failing to tape seams and staple holes creates water entry points. Improper window flashing is the number one source of residential water damage. Trapping the WRB behind the foundation instead of lapping over the sill plate. Using incompatible tape that fails over time. Not integrating roof-to-wall flashing with the WRB.